Click on a question below to see the answer.
To View all answers
| A: |
Click on Academics link on top bar and click on Periods link on left panel. The following screen appears. Now select a course and year or semester from course and year dropdowns and enter number of periods in No of Periods text box and click on create button to find the following screen. You can select multiple semesters/years at once. 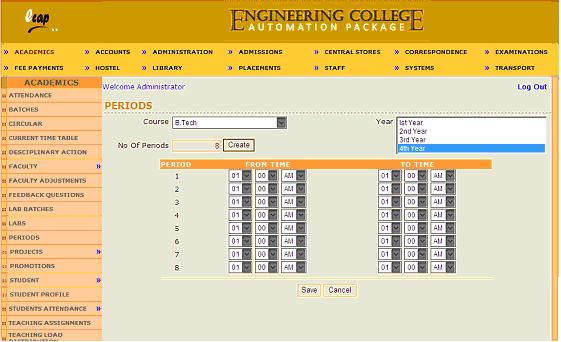
Now you can select start and end timings for individual periods and click on save button to save period slots for selected course and semester/year. |
| A: |
Click on Academics link on top bar and click on Attendance link on left panel. The following screen appears. 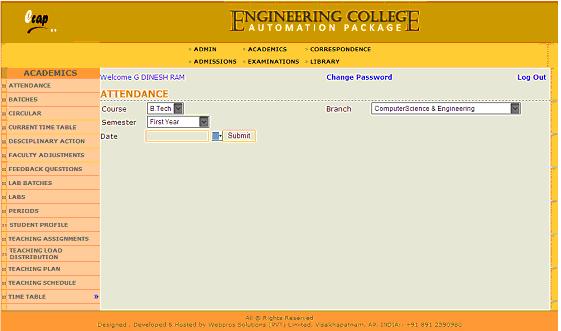
Now the faculty can select course, branch and semester from the dropdowns and select the date for which attendance needs to be posted and click on submit button to find the following screen. Below screen shows the list of students of selected semester and the period(s)/subject(s) which faculty taught on selected day. System wont allow the faculty to post attendance for the periods which are not covered by him or her. 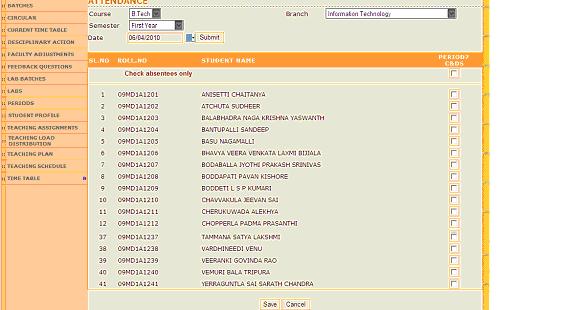
Now the faculty can check check boxes against student names to mark absentees and click on save button to save attendance for the subject on selected day. |
| A: |
Click on Academics link on top bar and click on Lab Batches link on left panel. The following screen appears. 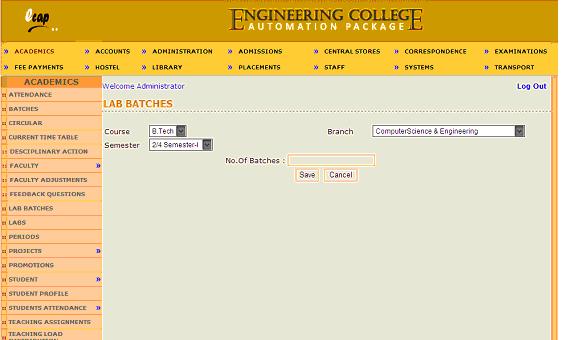
Now select the course, branch and semester from the dropdowns and enter number of batches students need to be divided, in the text box provided and click on save button to save number of batches. Now click on Batches link in the left panel to find the following screen. 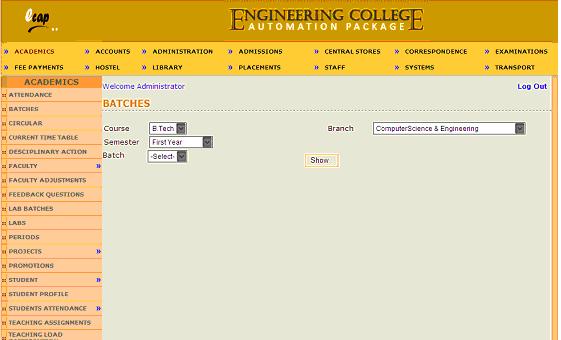
Now select course, branch, semester and batch from dropdowns and click on show button to find the next screen as follows. 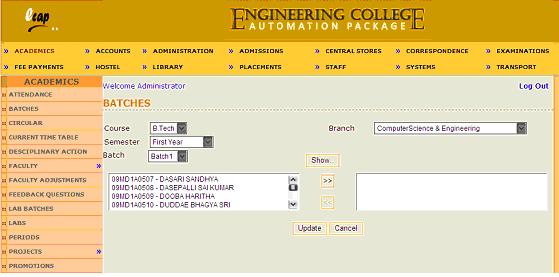
Above screen shows two text boxes. Left text box contains names of all students of selected semester and right text box is empty. Now select some students and click on >> button to assign them to batch 1 as follows. 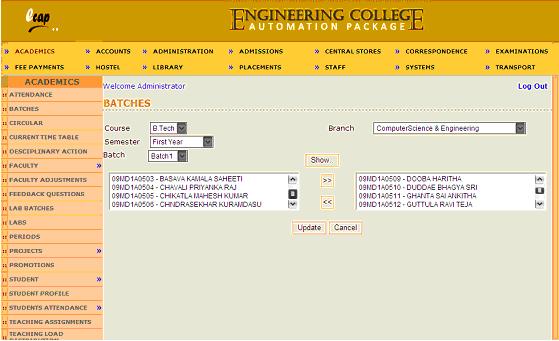
Now click on update button to save students for batch 1. User needs to repeat same procedure for other batches. |
| A: |
Click on Academics link on top bar and click on Circular link on left panel. The following screen appears. 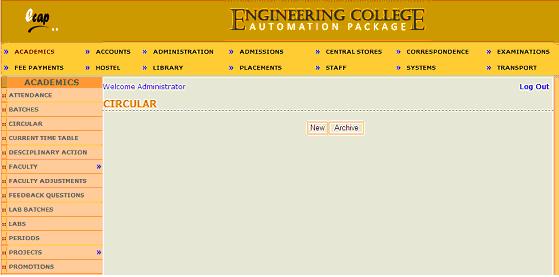
Click on New button to for new circulars. Click on Archive button to find past circulars. When new button is clicked, next screen appears as follows. 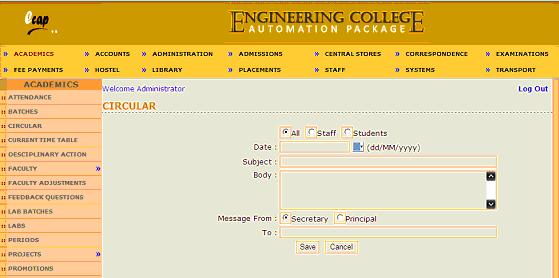
Now select appropriate radio button, date and type subject and body of circular in the text boxes provided. Select either secretary or principal by whom this circular shall be signed and type names or designations to whom this circular is intended to and click on save button to save the circular as well as to preview circular in proper format in word document and printout can be taken. Staff and students can also find circulars online. |
| A: |
Current time table link will display complete teaching activity taking place in the campus at a particular point of time. This will facilitate administrator/principal to know which faculty should be in which class room at specific point of time as per time table so that they can question the faculty if found elsewhere. To view current time table at specific hour, click on academics link on top bar or current time table link on left panel of academics module to find the following screen. 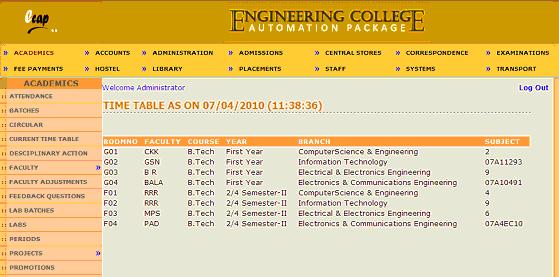
|
| A: |
Click on Academics link on top bar and click on Disciplinary Action link on left panel. The following screen appears. 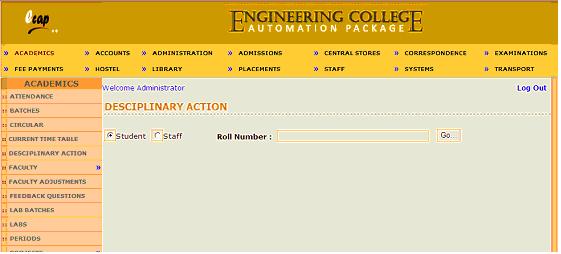
Now select student or staff radio button and type student roll number or staff code number and click on Go button to find the following screen. 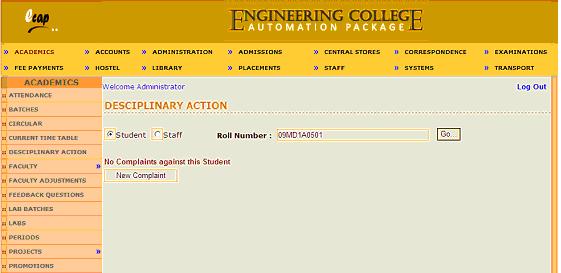
This screen shows already registered complaints if any. Now click on New complaint button to find the following screen. 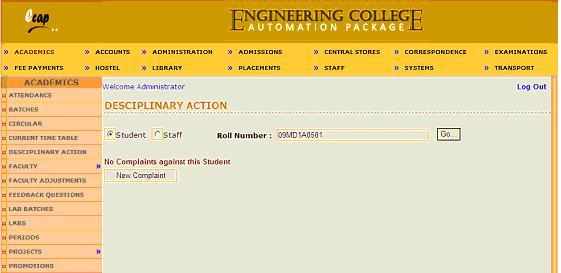
Now type complaint received from, nature of complaint and select complaint date and click on save button to register the complaint against selected student or faculty. |
| A: |
Click on Academics link on top bar and click on Disciplinary Action link on left panel. The following screen appears. 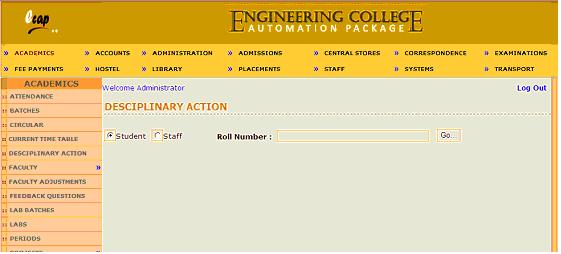
Now select student or staff radio button and type student roll number or staff code number and click on Go button to find the following screen. 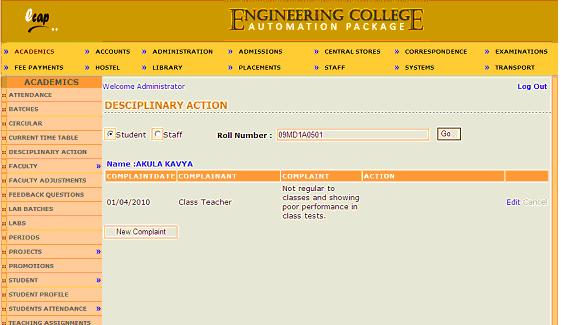
Above screen displays already registered complaints if any. Now click on Edit button to find the next screen. 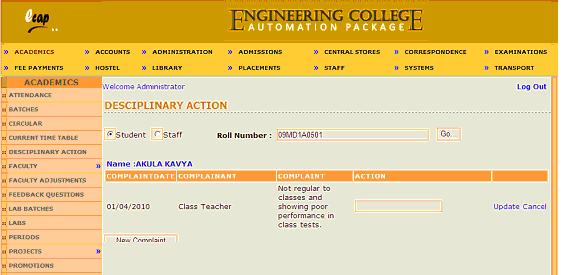
Now enter Action taken details in the text box provided and click Update link to save the details. |
| A: |
Click on Academics link on top bar and click on Labs link on left panel. The following screen appears. 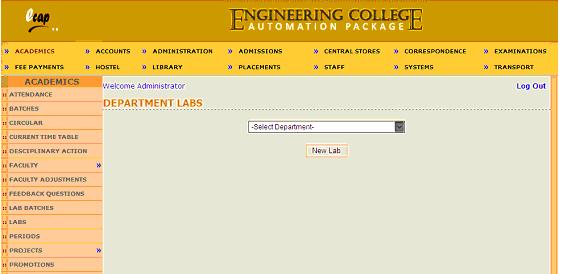
Now select any department and click on New Lab button to find the next screen as follows. 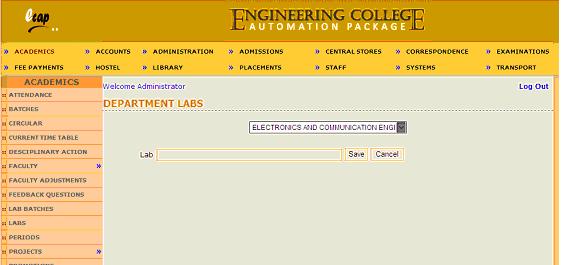
Now enter new lab name in the text box provided and click on save button to save the record. |
| A: |
Click on Administration link on top bar and click on Subjects link on left panel. The following screen appears. 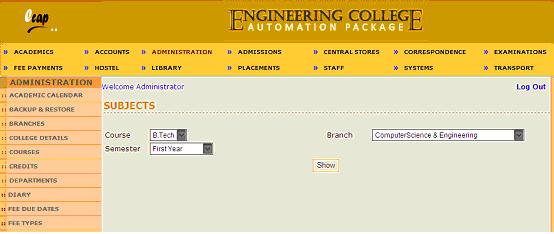
Now select course, branch and semester from dropdowns and click on show button to find the next screen as follows. 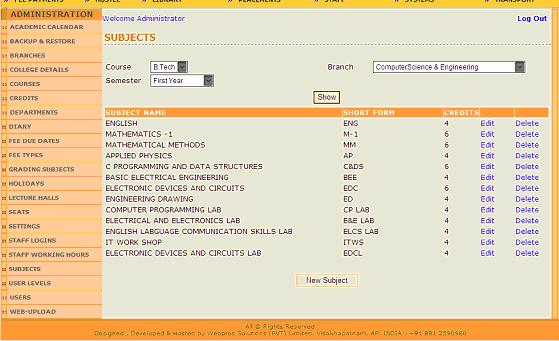
Now select any lab subject and click on edit button against lab subject name. Next screen appears as follows. 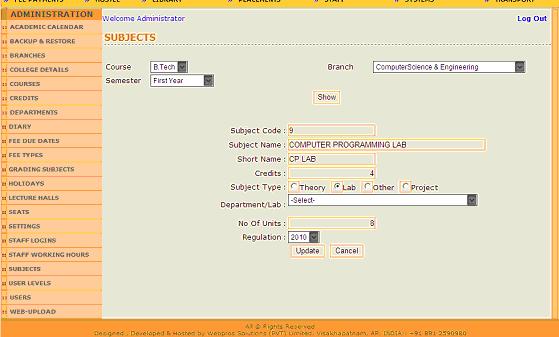
Now select the department from the dropdown to find the list of labs and select any lab offering this lab subject and click on update button to save the details. Please note that unless you assign subjects to labs, you wont find lab schedules reports. |
| A: |
Click on Academics link on top bar and click on Promotions link on left panel. The following screen appears. 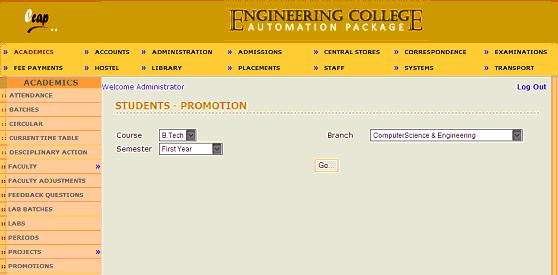
Now select course, branch and semester from dropdowns and click on Go button to find the next screen as follows. 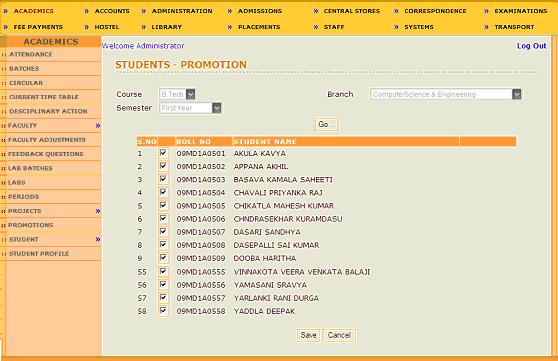
Above screen shows all eligible students of first year, B.Tech Computer Science & Engg students having attendance 75% and above for being promoted to second year first semester. Check boxes against qualified students names are checked by default. If any student(s) is(are) not qualified for promotion, check boxes against their names are not selected and reasons for disqualification will be indicated beside their names. However system allows administrator to select check boxes for disqualified students and still consider them for promotion. System will also consider number of credits besides attendance percentage while qualifying students from previous semester to next semester. Click on Save button to finally promote students from selected semester to next semester. |
| A: |
Click on Academics link on top bar and click on Student Profile link on left panel. The following screen appears. 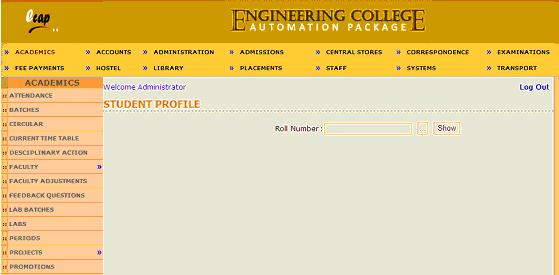
Now enter roll number of a student or select roll number of a student from another window by clicking on search button and click on show button to find the next screen as follows. 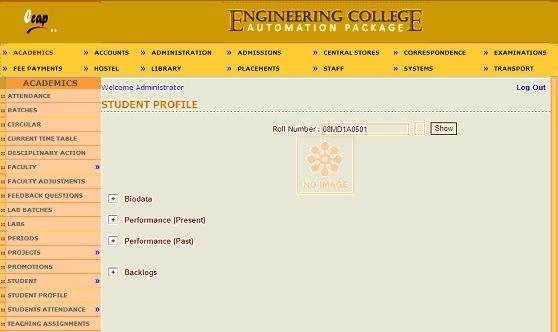
Above screen displays the image of selected student and shows Biodata, Performance(Present), Performance(Past) and Backlogs labels. If you click on + button before Biodata label, it will show the complete Biodata of selected student. If you click on + button before Performance(Present), it will show the attendance performance as well as marks obtained by the student in various internal exams during the current semester. If you click on + button before Performance (Past) label, it will display total marks obtained by the student upto the current semester. Performance (Present) and Performance (Past) links also show paper presentations and academic achievements if any of the selected student. If you click on + button before Backlogs label, it will display backlogs subjects if any of selected student. Student profile link is very much useful to counselors while counseling stude nts/parents. |
| A: |
Click on Academics link on top bar and click on Teaching Assignments link on left panel. The following screen appears. 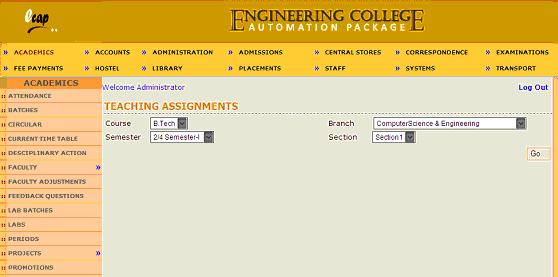
Now select course, branch, semester and section from dropdowns and click on Go button to find next screen as follows. 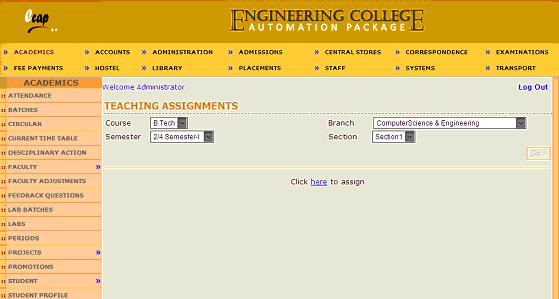
Now click on Here link to find next screen as follows. 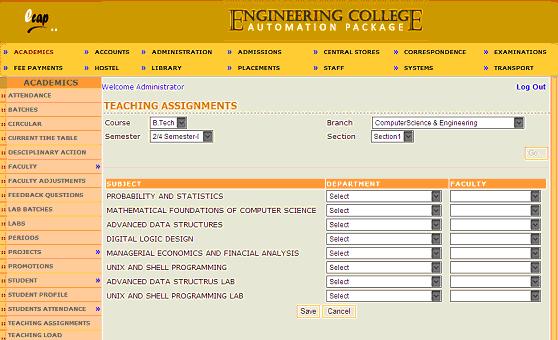
Now select department and faculty from dropdowns against each subject and click on Save button to assign subjects to faculties.
|
| A: |
Click on Academics link on top bar and click on Faculty Adjustments link on left panel. The following screen appears. 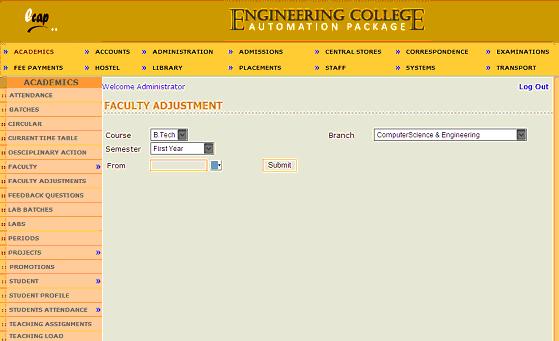
Now select course, branch, semester and date and click on submit button to find the next screen as follows. 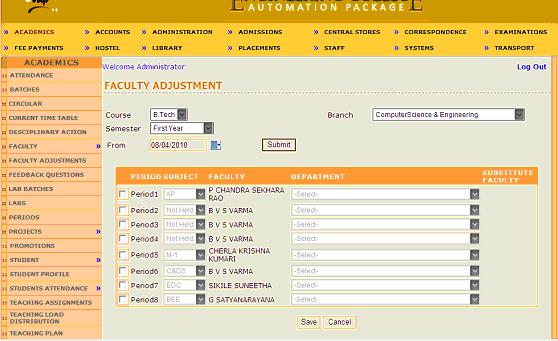
Now select the period for which faculty needs to be changed. It will highlight subject dropdown and show the subject from time table by default. Now you can change subject or faculty by selecting department dropdown and choosing substitute faculty or both and click on save button to save the adjustments for the selected day. |
| A: |
Administrator or principal or HOD can post academic achievements if any for selected faculty. To do this please Click on Academics link on top bar and place cursor on Faculty link on left panel and select achievements link from popup menu. The following screen appears. 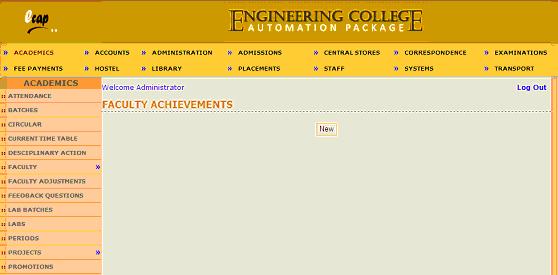
Now click on New button to find the following screen as follows. 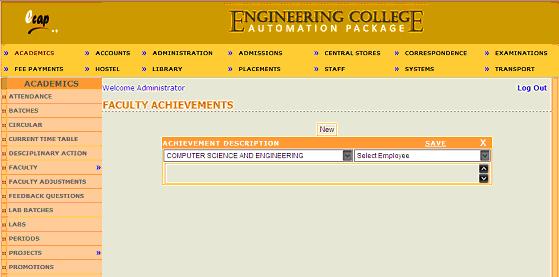
Now select department and the faculty from dropdowns and enter achievement description in text box provided and click on save link to save the details. These achievements will be reflected in performance report of individual faculties. |
| A: |
It is needed to find out leisure time of staff/faculties to draft them for exam invigilation or other works. To know leisure time of staff, please click on Academics link on top bar and place cursor on Faculty link on left panel and select Leisure Time link from popup menu. The following screen appears. 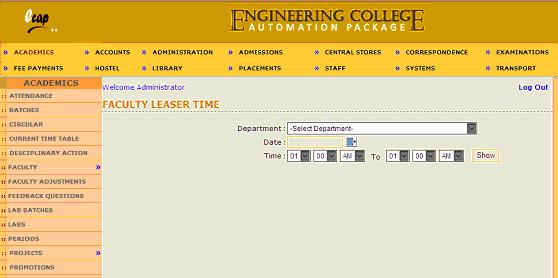
Now select department from dropdown and select date, from time and To time and click on show button to know the staff who are free during the time selected. The screen will be as follows. 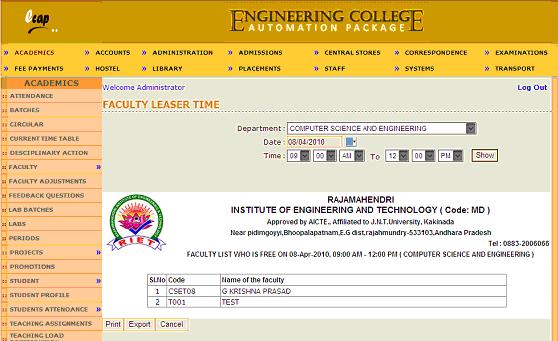
|
| A: |
Administrator or principal or HOD can post details of research papers presented or published if any for faculties. These details will be reflected in performance report of concerned faculty. To do this please Click on Academics link on top bar and place cursor on Faculty link on left panel and select Research Papers link from popup menu. The following screen appears. 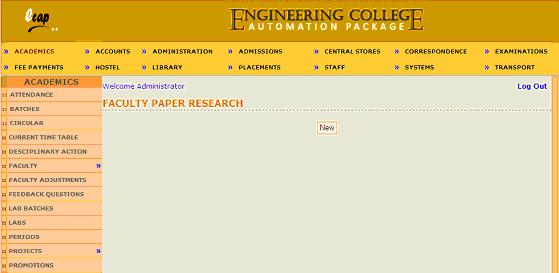
Now click on New button to find the following screen. 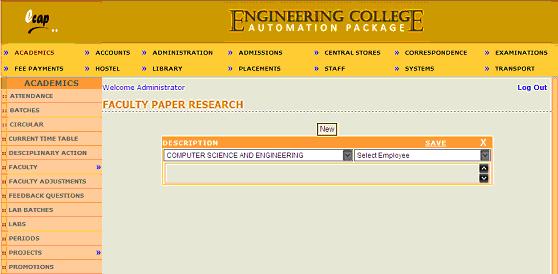
Now select department and faculty from dropdowns and enter details of research work in the text box provided and click on Save link to save the details. |
| A: |
Some time Principal or HOD needs to assign special work other than teaching tasks to faculties. To do so, please click on Academics link on top bar and place cursor on Faculty link on left panel and select Special Assignments link from popup menu. The following screen appears. 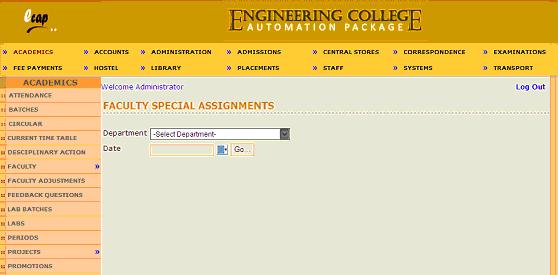
Now select department to find faculties list and select a faculty and select date and click on Go button to find next screen as follows. 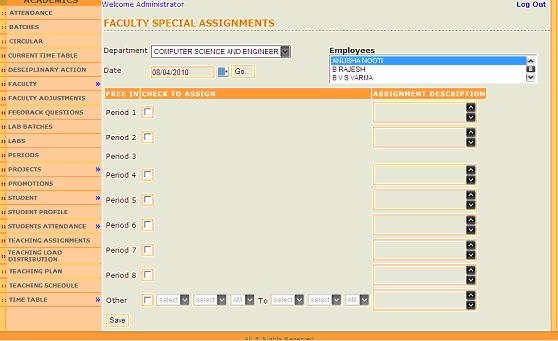
Check boxes will be displayed against the periods during which the selected faculty is free on the day selected. Now select any period(s) and enter the assignment description in text box(es) provided and click on save button to save the assignments. These assignments will be displayed to faculties when they login. |
| A: |
Click on Academics link on top bar and place cursor on Faculty link on left panel and select Work Order link from popup menu. The following screen appears. 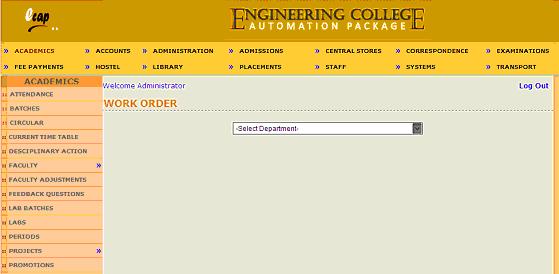
Now select a department. Faculties list will be automatically displayed and select a faculty and click on show button to view the weekly teaching work load of selected faculty. The report will be as follows. 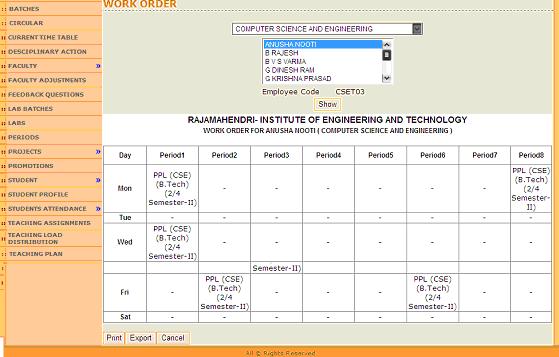
|
| A: |
Click on Academics link on top bar and place cursor on Faculty link on left panel and select Work Schedule link from popup menu. The following screen appears. 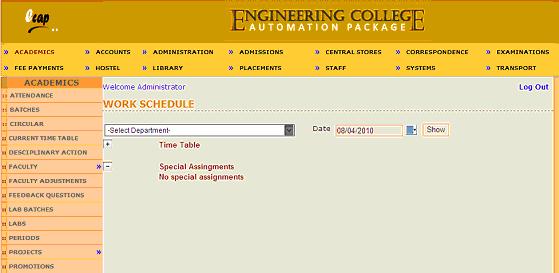
Now select a department. Faculty list will be displayed automatically and select a faculty and date and click on show button to view work load of selected faculty including special assignments if any on the day selected. The screen will be as follows. 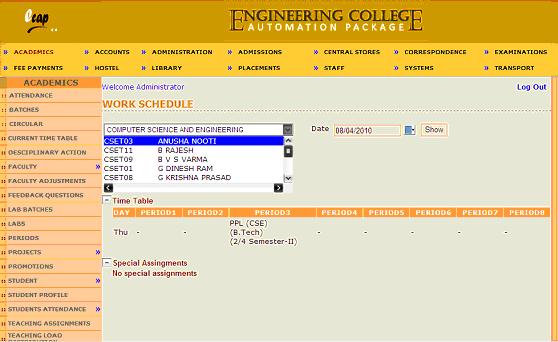
|
| A: |
It is very much important to consider performance of faculties before considering them for increments or promotions. To do so click on Academics link on top bar and place cursor on Faculty link on left panel and select Performance link from popup menu. The following screen appears. 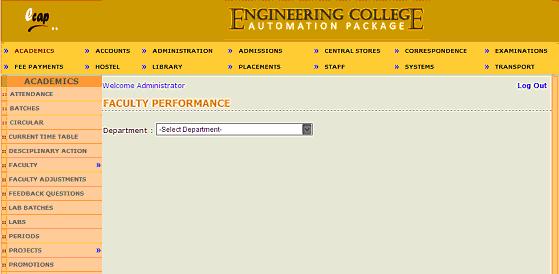
Now select a department. Faculty list will be displayed automatically. Select a faculty from the list and click on show button to find the screen as follows. 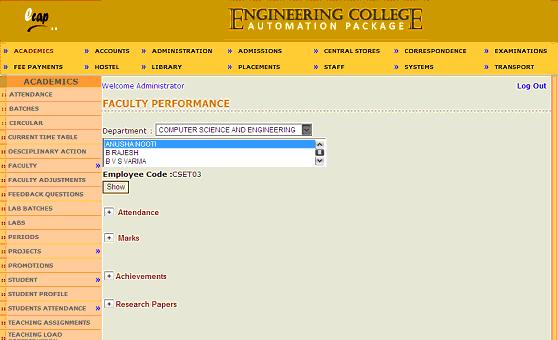
Four labels i.e Attendance, Marks, Achievements and Research Papers are displayed having + symbols before them. If you expand Attendance by clicking on + symbol, it will show subject wise number of hours to be taken as per time table and actual number of hours taken by the faculty. If you expand Marks by clicking on + symbol, it will show subject wise no of students passed, failed, Max marks, min marks, Avg marks during last academic year. If you expand Achievements by clicking on + symbol, it will show academic or non academic achievements if any entered for this faculty. If you expand Research Papers by clicking on + symbol, it will show details of paper presentations or paper publications if any entered for this faculty. |
| A: |
Click on Academics link on top bar and click on Feedback Questions link on left panel. The following screen appears. 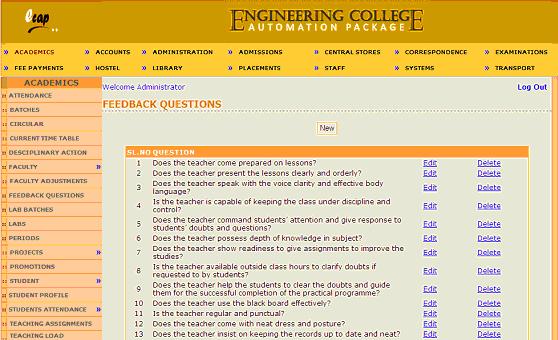
This screen already contains questions. These questions can either be deleted or edited. New questions can also be added by clicking on new button. These questions will be displayed to students while giving feedback on faculty. They need to select either Outstanding or Very Good or Good or Average or Poor options for every question.
|
| A: |
Click on Academics link on top bar and click on Teaching Plan link on left panel. The following screen appears. 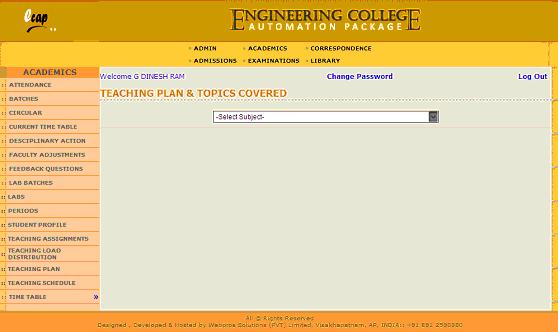
Now faculty will select a subject from the dropdown to find the next screen as follows. 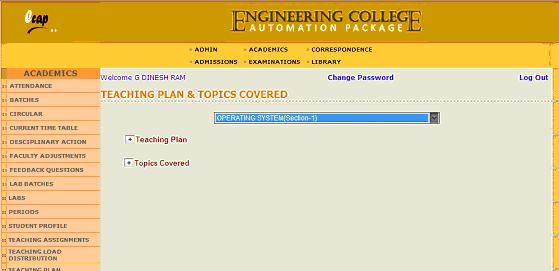
Now expand teaching plan by clicking + symbol before teaching plan to find the next screen as follows. 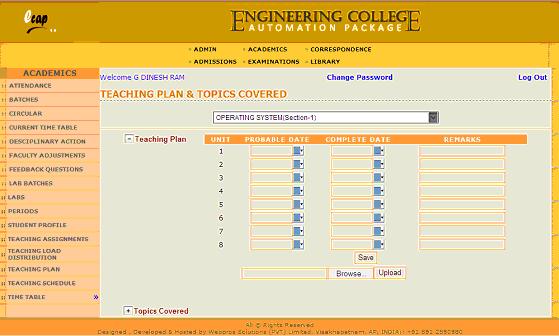
Now enter probable finishing dates unit wise for selected subject and click on browse button to locate complete teaching plan for selected subject and upload it by clicking on upload button. This is done by faculty prior to semester begins. Once semester starts, faculty will be entering unit wise actual dates of completion along with remarks if any. |
| A: |
Click on Academics link on top bar and click on Teaching Plan link on left panel. The following screen appears. 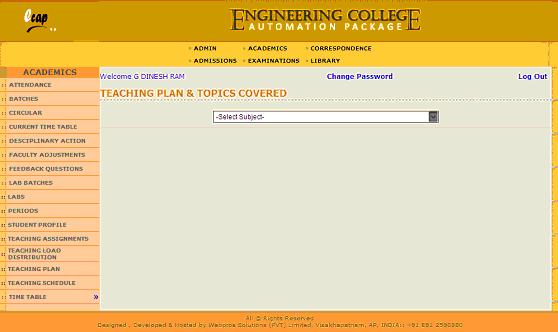
Now faculty will select a subject from the dropdown to find the next screen as follows. 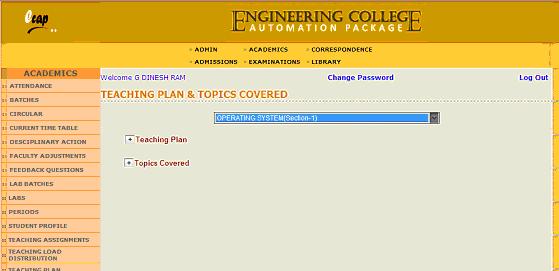
Now expand Topics covered by clicking on + symbol before Topics covered to find the next screen as follows. 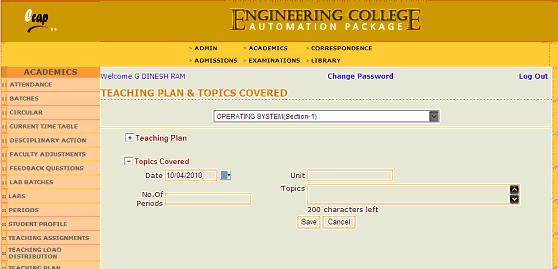
Now select date, type unit, no of periods and topics covered in respective text boxes for the day and subject selected and click on save button to save details. |
| A: |
Click on Academics link on top bar and click on Teaching Schedule link on left panel. The following screen appears. 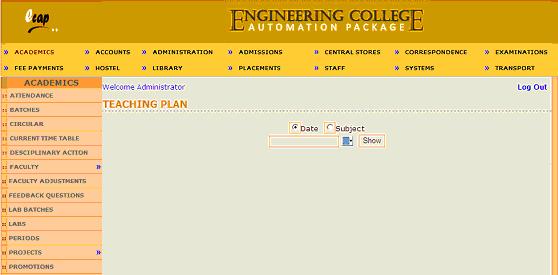
Now select date and click on show button to see topics covered by all faculties on selected day. If you need to see subject wise teaching plan, click on subject radio button to find the next screen as follows. 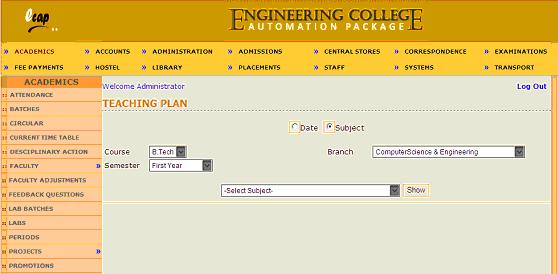
Now select course, branch, semester and subject from respective dropdowns and click on Show button to find the next screen as follows. 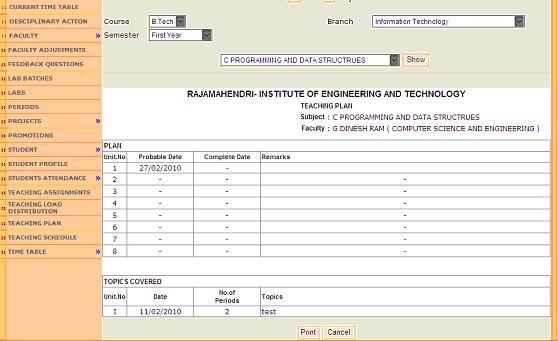
In above screen, complete teaching plan including document uploaded by the faculty and topics covered till date are displayed. |
| A: |
Click on Academics link on top bar and place cursor on Students Attendance link on left panel and select Online link from popup menu. The following screen appears. 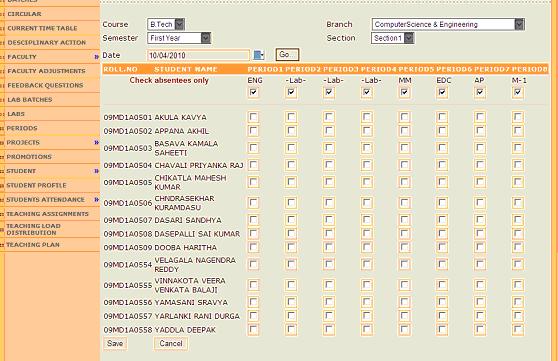
Now select course, branch, semester and section from dropdowns and select date and click on Go button to find next screen as follows. 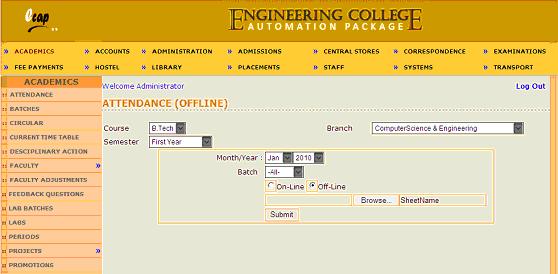
You need to select absentees only and click on save button to save attendance for the day selected. First row shows subjects and check boxes are displayed below to subjects. If subject is changed i.e one faculty attends in place of another faculty, deselect the check box below to the concerned subject to find subjects dropdown so that another subject can be selected to mark attendance for the changed subject. |
| A: |
Click on Academics link on top bar and place cursor on Students Attendance link on left panel and select Offlinelink from popup menu. The following screen appears. 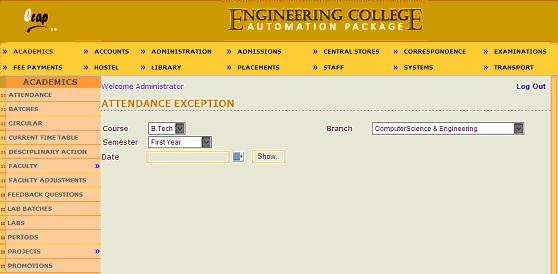
Now select course, branch, semester, month and year, batch from dropdowns and select offline radio button and locate excel sheet in local system by clicking on browse button and click on submit button. System will extract attendance records from excel sheet and store in database. Batch wise excel sheets need to be maintained.
|
| A: |
Sometimes it is needed to modify attendance records after got posted. To do so, click on Academics link on top bar and place cursor on Students Attendance link on left panel and select Exception link from popup menu. The following screen appears. 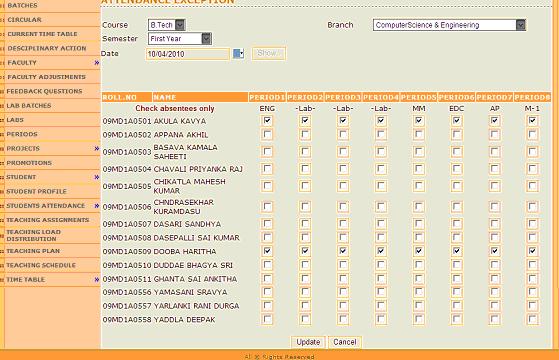
Now select course, branch, semester and date and click on show button to view attendance records posted already as follows. 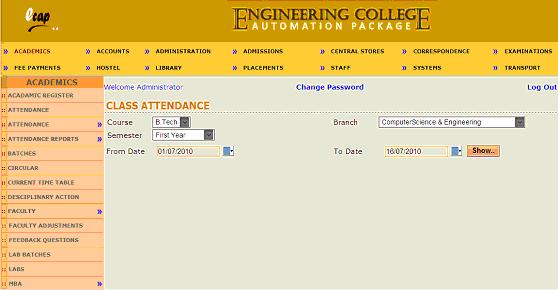
Now deselect check boxes against students who were marked as absent previously or select check boxes against students who were marked as present in the past and click on update button to save the changes. |
| A: |
Click on Academics link on top bar and place cursor on Attendance Reports link on left panel to find a Popup menu containing Class, Monthly, Register, Shortage, Student and Subject Reports . If you want to see attendance performance of students of entire class, click on Class to find the next screen as follows. 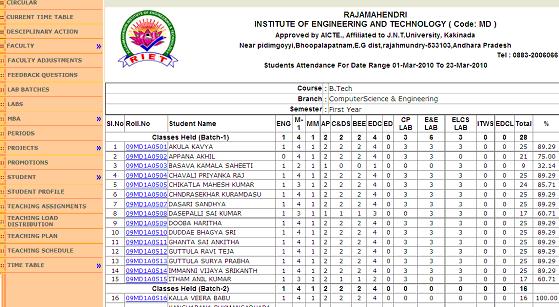
Now select course, branch and semester from respective dropdowns and select from date and to date i.e the period for which you want to view attendance report and click on show button to find the report as follows. 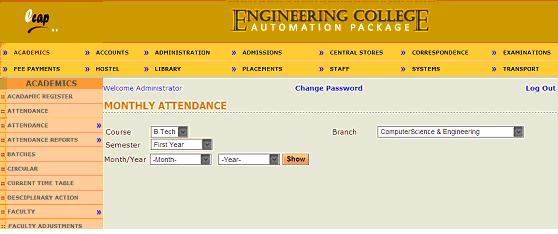
Now you can view number of classes held subject wise during the period selected and student wise number of classes attended for each subject along with total attendance percentage for each student. Report will show students lab batch wise as number of lab sessions differ from batch to batch. There will be hyperlink on every student roll number, once clicked , student profile will be opened in new window for selected student. If you want to see monthly attendance performance of students, you need to click on monthly link from popup menu to find the next screen as follows. Now select Course, branch, semester, month and year from respective dropdowns and click on Show button to find the report as follows. 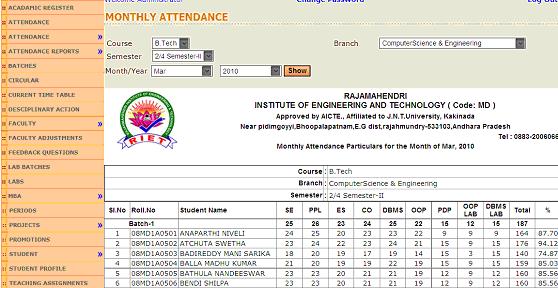
Above report shows number of classes held for each subject and number of classes attended for each subject by each student along with attendance percentage for each student for the month selected. If you want to view attendance register (Muster) of students for a month, click on Register link from popup menu to find the next screen as follows. 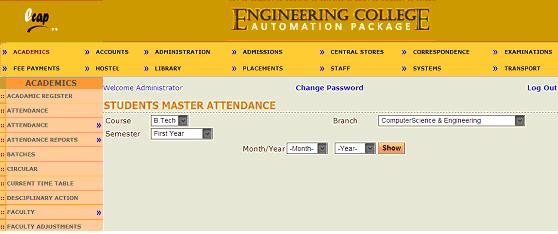
Now select course, branch, semester, month and year from respective dropdowns and click on show button to view attendance register as follows. 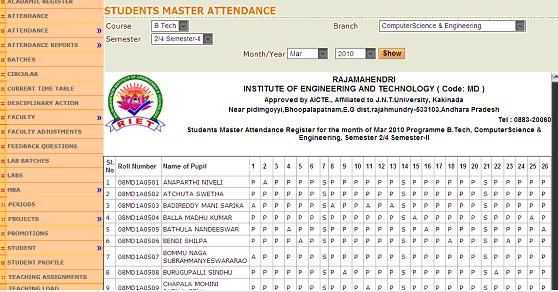
Above report shows day wise present/absent status for each day for selected month. If you want to view list of students having attendance percentage less than some percentage entered, click on Shortage link from the popup menu to find the next screen as follows. 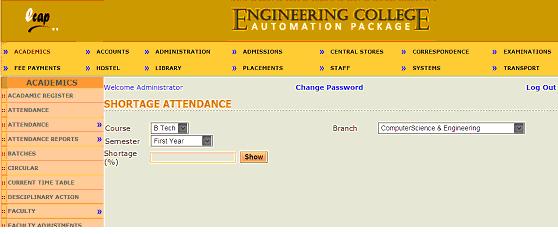 Now select course, branch and semester from dropdowns and enter percentage below which you want to view students having attendance percentage and click on Show button to find the report as follows.
 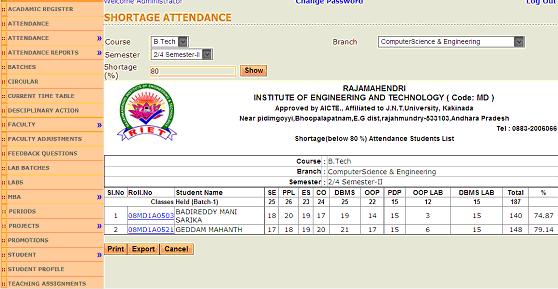 Above report shows list of students having attendance percentage below to the percentage entered.
If you want to view period wise attendance performance of a student for certain period, click on student link from the popup menu to find the next screen as follows.
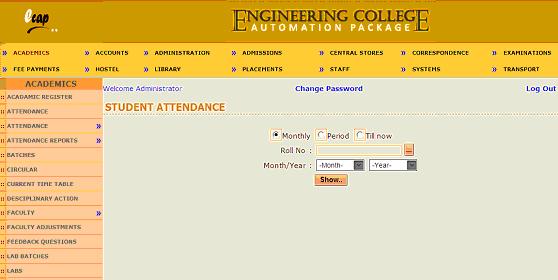 Now you can enter or select roll number of student whose attendance report needs to be seen and select either monthly or period or Till now radio buttons. If monthly button is selected, you need to select month and year from dropdowns and click on show button to find the report as follows.
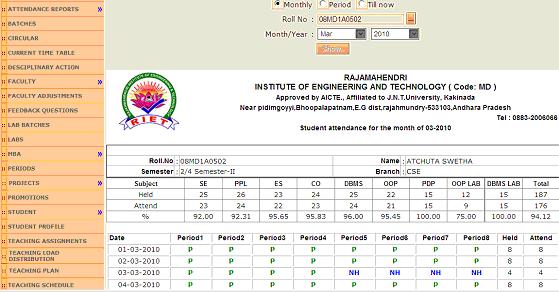 Above report shows number of classes held for each subject and number of classes attended by the student for each subject during the month selected. Period wise attendance status will be shown for all days during the month selected.
If you want to view attendance reports for selected subject, you need click on subject link from popup menu to find the next screen as follows.
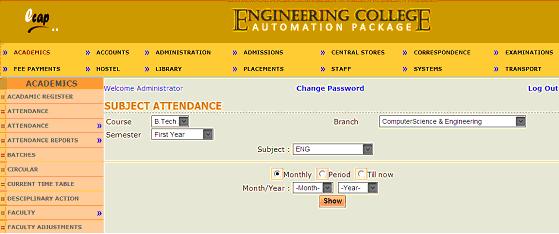 Now select course, branch, semester and subject from respective dropdowns and select either monthly or period or Till now radio buttons. If monthly button is selected, select month and year and click on Show button to find the report as follows.
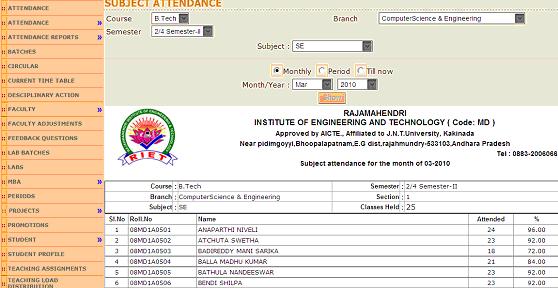 Above report shows number of classes held for selected subject during the month selected and number of classes attended by each student during the month selected along with attendance percentage for that subject.
|
| A: |
Click on Academics link on top bar and click on Teaching Load Distribution link on left panel. The following screen appears. 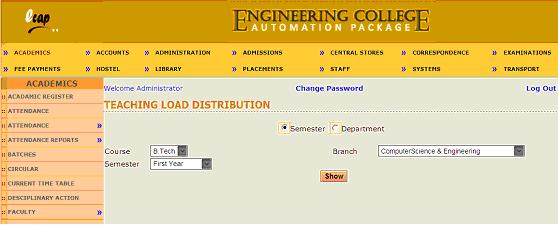
Now select Semester radio button and select course, branch and semester from respective dropdowns and click on show button to find the next screen as follows. 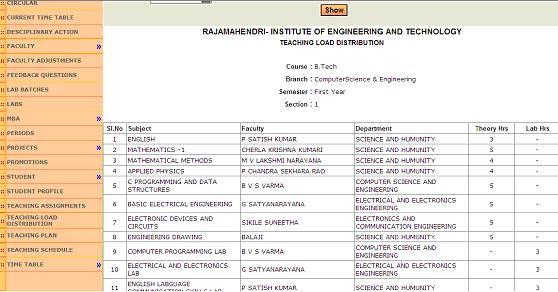
Above screen shows number of theory or lab hours per week for all subjects including names of faculties and their departments. |
| A: |
Click on Academics link on top bar and click on Teaching Load Distribution link on left panel. The following screen appears. 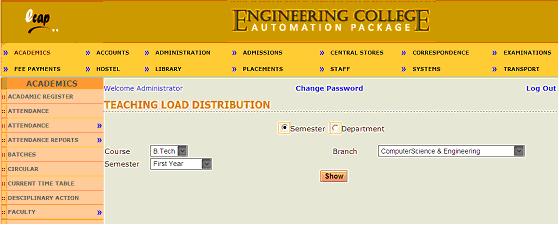
Now select Department radio button and select course, branch and semester from respective dropdowns and click on show button to find the next screen as follows. 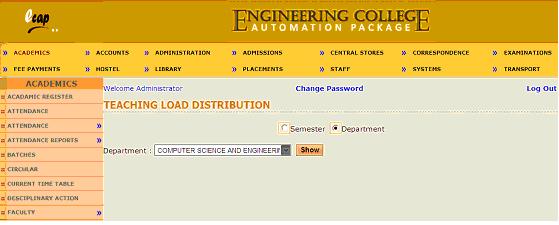
Now select any department and click on show button to find the report as follows. 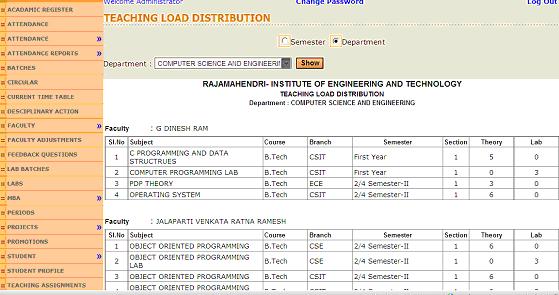
Above screen shows faculty wise teaching load distribution within the department selected. |
| A: |
You need to enter time tables separately for theory and lab subjects as labs differ from batch to batch whereas theory subjects are common for all batches. Click on Academics link on top bar and place cursor on Time Table link and click Theory link from the popup menu displayed to find the screen as follows. 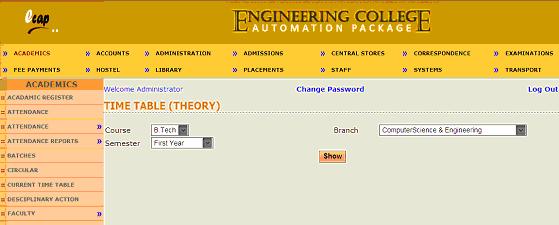
Now select course, branch and semester and click on show button to find the next screen as follows. 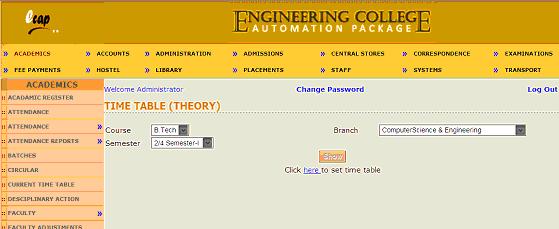
If time table is already entered for the selected semester, it would show the time table and you can edit if needed. Now click on here link to find the next screen as follows. 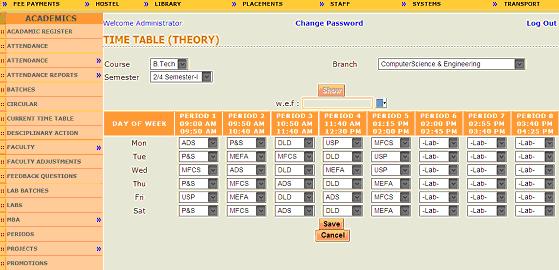
Now select the date from which time table comes into force and select theory subjects from the dropdowns for each period for all days and click on Save button. For lab slots, just select lab from the dropdowns. You won’t find lab subjects in the dropdowns. Now place cursor on time table link and click on Lab link from the popup menu to find the next screen as follows. 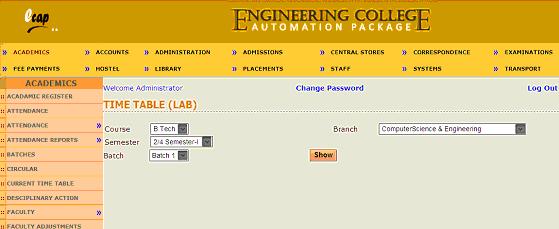
Now select course, branch and semester from respective dropdowns and select batch from dropdown and click on show button to find the next screen as follows 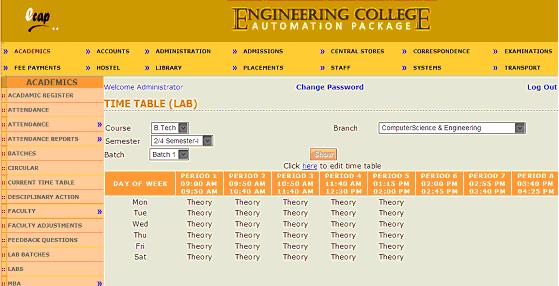
Now click on Here link to add time table for labs. Next screen will be as follows. 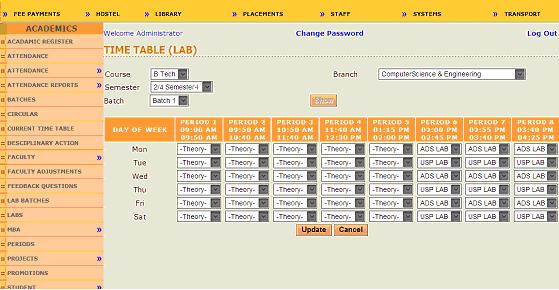
Now select lab subjects from dropdowns for the periods for which lab was selected in theory timetable and click on update button to save lab time table for the batch selected. Similarly you need to enter lab time table for other batches of students as well. |
| A: |
Click on Academics link on top bar and place cursor on Time Table link and click Report link from the popup menu displayed to find the screen as follows. 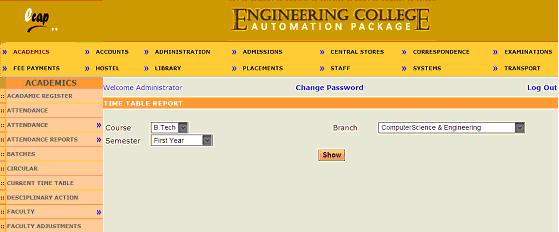
Now select course, branch and semester from the dropdowns and click on show button to view the time table for selected semester as follows. 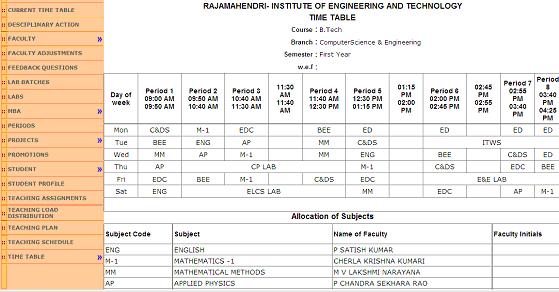
Above screen shows time table for the selected semester including the corresponding faculties. You can print time tables by clicking on Print button provided below to the report. |
| A: |
Click on Academics link on top bar and place cursor on Time Table link and click on Lab Schedule link from the popup menu displayed to find the screen as follows. 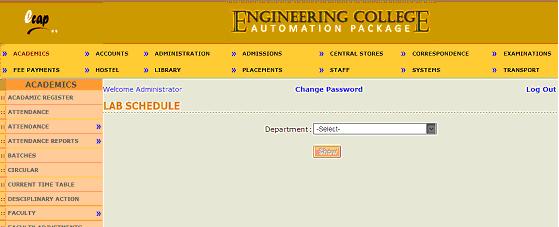
Now select any department to find the next screen as follows. 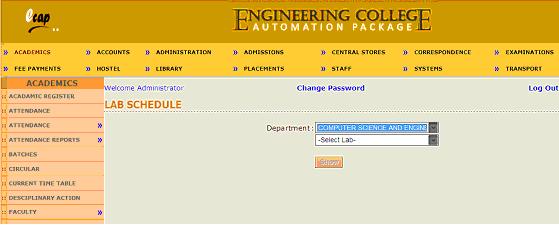
Now select any lab and click on show button to find the screen as follows. 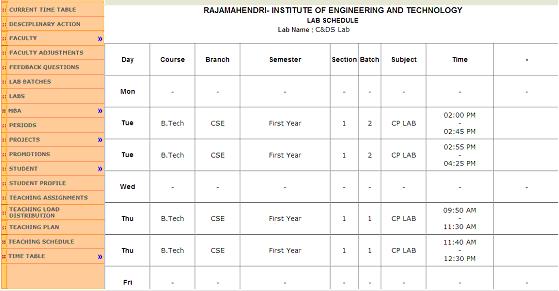
Above screen shows day wise schedules i.e which batch and which semester and which branch and which course students shall attend lab during the slots mentioned. |
| A: |
Day time table shows time tables of all semesters or years for selected day or for all days for a selected course. Click on Academics link on top bar and place cursor on Time Table link and click on Day Time Table link from the popup menu displayed to find the screen as follows. 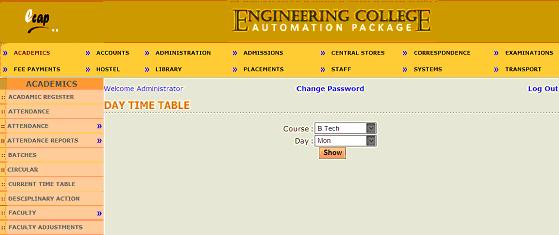
Now select course and day from dropdowns and click on show button to find the report as follows. 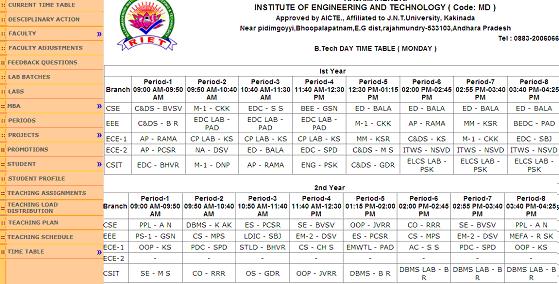
Above report shows time tables of all semesters of B.Tech course for Monday. |
| A: |
Academic register means a report containing day wise attendance performance of all students for a selected subject or day wise attendance performance of single student for all subjects including marks of internal examinations. Click on Academics link on top bar and click on Academic Register link to find the next screen as follows. 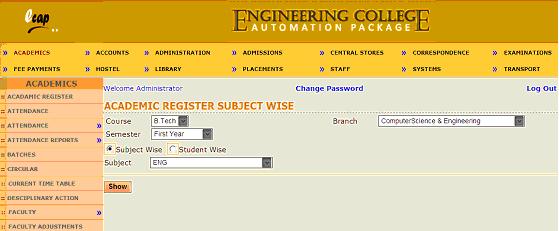
Now select course, branch and semester from dropdowns and select either subject wise or student wise radio buttons. If subject wise radio button is selected, select a subject from subject dropdown and click on show button to find the report as follows. 
Above report shows date wise attendance performance for all students of SE subject right from beginning of semester to till date including attendance percentage and marks obtained in internal examinations. You need to scroll the report horizontally to find all columns if needed. If student wise radio button is selected, the screen will be as follows. 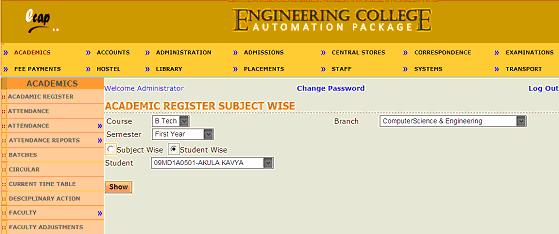
Now select any student from the dropdown and click on show button to find the report as follows. 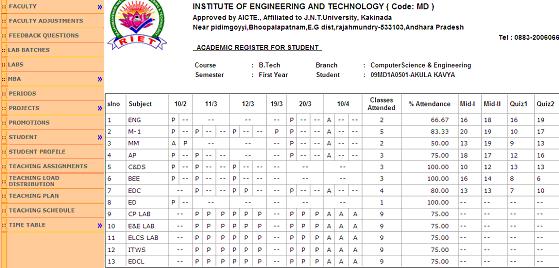
Above report shows attendance performance of selected student for every day right from first day of semester to till date for all subjects including attendance percentage and marks obtained in internal examinations. |