Click on a question below to see the answer.
To View all answers
| A: |
Click on Admissions link on top bar and place cursor on Admission link on left panel and click on Online link from the popup menu displayed to find the next screen as follows. 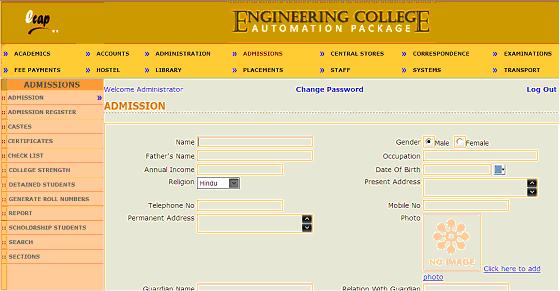
Now enter student name, contact and admission details including photograph and click on save button to save new student details. Data needs to be entered for each student taking admission in the college. |
| A: |
If students data is already available in excel sheet in the format prescribed, then system can read students data from the file and dump data in the database. Click on Admissions link on top bar and place cursor on Admission link on left panel and click on Offline link from the popup menu displayed to find the next screen as follows. 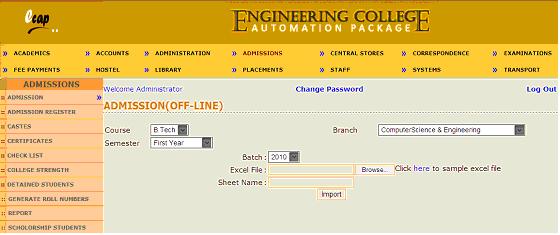
Now select course, branch, semester and batch from the dropdowns and browse for excel file from local system by clicking on Browse button and enter sheet name containing data in the text box provided and click on import button to download students data from the excel file into the database. Sample excel file containing the format can be downloaded by clicking on here link.
|
| A: |
Click on Admissions link on top bar and click on Admission Register link on left panel to find the next screen as follows. 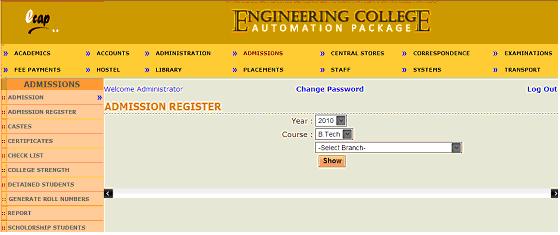
Now select year, course and branch and click on show button to view admission register of students of selected branch and course joined during the year as follows. 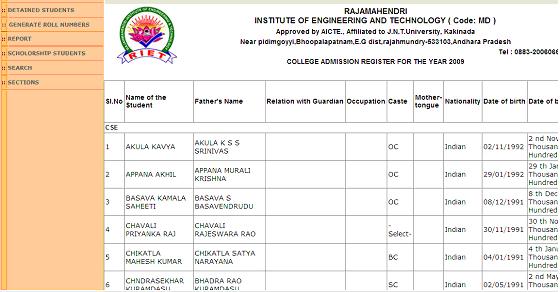
Above report shows data entered at the time of admission including roll numbers allocated for the students admitted in the selected branch and course during the year selected. |
| A: |
Click on Admissions link on top bar and click on Castes link on left panel to find the next screen as follows. 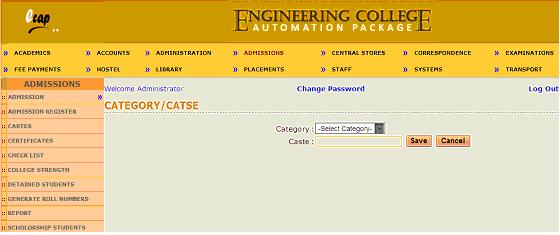
Now select category. If castes are already added to the selected category, they will be displayed in the data grid as follows. 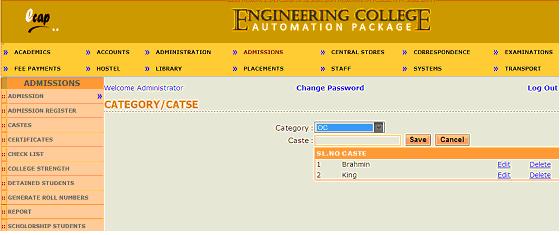
Now previously entered castes can either be edited or deleted and new caste can be entered in the text box provided and click on save button to save new castes. |
| A: |
Click on Admissions link on top bar and click on Certificates link on left panel to find the next screen as follows. 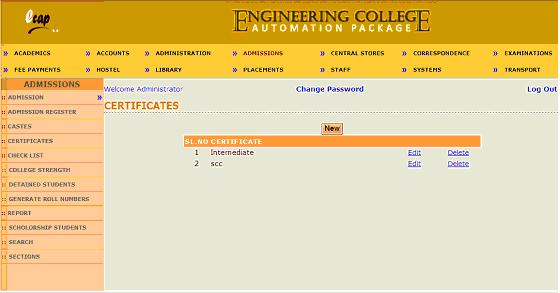
Previously entered certificates can either be edited or deleted. To add new certificate, click on New button to find the next screen as follows. 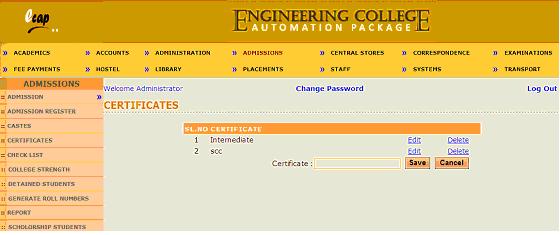
Now enter new certificate in the text box provided and click on save button to save new certificate. |
| Q: | 6) How to save and check which certificates were submitted by a student at the time of admission? |
| A: |
Click on Admissions link on top bar and click on Checklist link on left panel to find the next screen as follows. 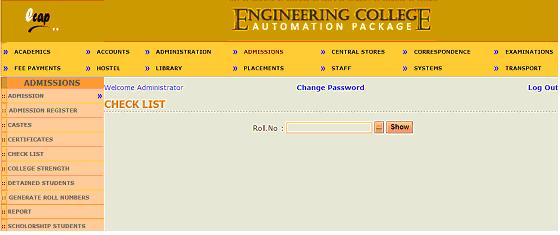
Now enter or select roll number of a student and click on show button to find next screen as follows. 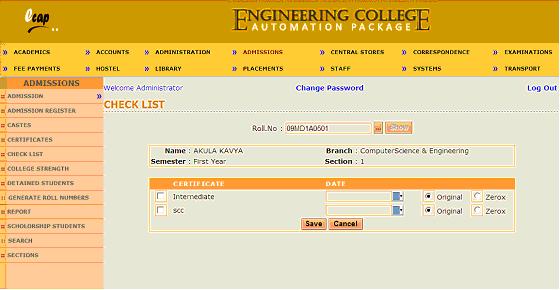
Now select check boxes against certificates and select dates and original or zerox and click on save button to save certificates submitted by student selected during admission. |
| A: |
Click on Admissions link on top bar and click on College Strength link on left panel to find the next screen as follows. 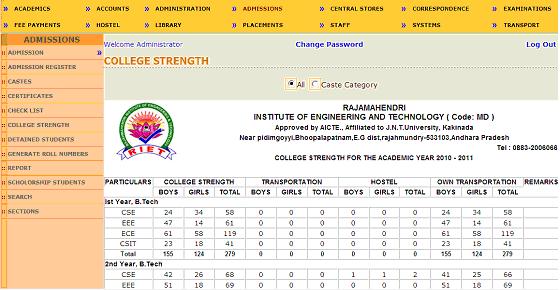
Now select Caste category radio button to find next screen as follows. 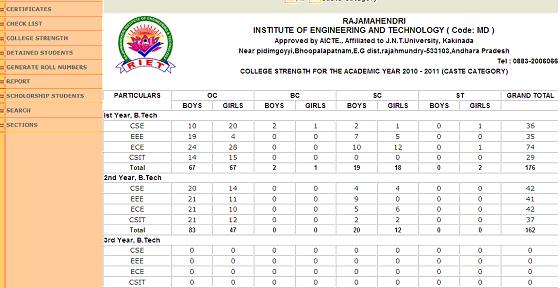
Above report shows category wise male and female students for all years of courses. |
| A: |
Click on Admissions link on top bar and click on College Strength link on left panel to find the next screen as follows. 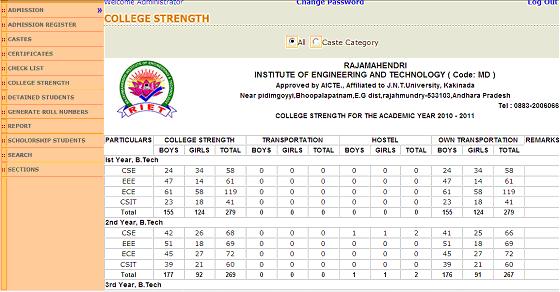
Above report shows male and female students of all courses who are day scholars, hostlers and avail bus transport facility.
|
| A: |
Click on Admissions link on top bar and click on Detained Students link on left panel to find the next screen as follows. 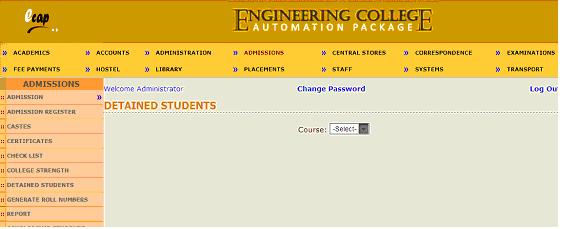
Now select course to find list of students who were previously detained along with check boxes against students names. Now select check boxes against students who seek readmission and click on save button to save record.
|
| A: |
Click on Admissions link on top bar and click on Generate Roll Numbers link on left panel to find the next screen as follows. 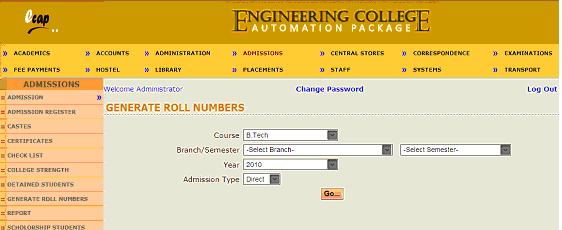
Now select course, branch, semester, year and admission type from dropdowns and click on Go button to generate roll numbers. Next screen will be as follows. 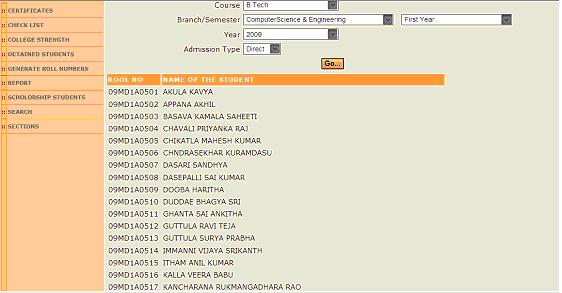
Above screen shows 10 digit roll numbers generated as per JNTU pattern for students of selected course, branch and year. |
| A: |
Click on Admissions link on top bar and click on Report link on left panel to find the next screen as follows. 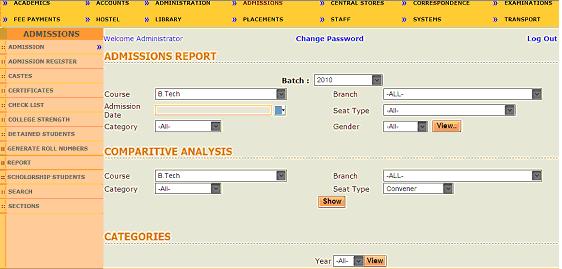
Now select batch, course, branch and seat type from the dropdowns and click on view button to view the students admitted for the selected course, branch and seat type. Other dropdowns can also be used to filter results further. Report will be as follows. 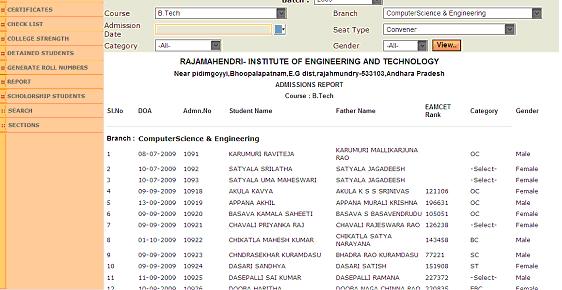
Above report shows admission details of students for the combination of course, branch and seat type selected. |
| A: |
Click on Admissions link on top bar and click on Report link on left panel to find the next screen as follows. Now in comparative analysis section, select course, branch, category and seat type from dropdowns and click on Show button to view the report as follows. 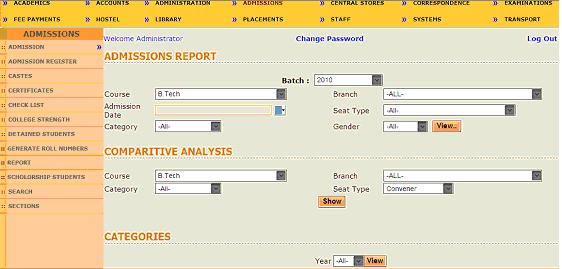
Above report shows current year admission trend comparing with those of last 3 years. There is no data for years 2006 and 2007. 2009 year admissions are being compared with those of 2008, 2007 and 2006. 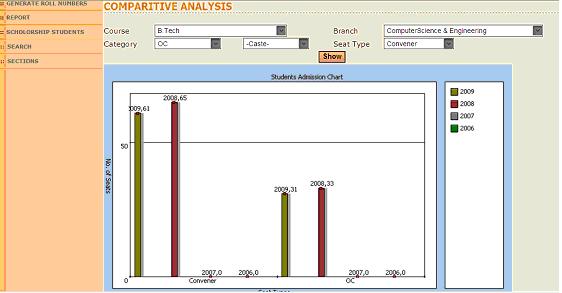
|
| A: |
Click on Admissions link on top bar and click on Report link on left panel to find the next screen as follows. 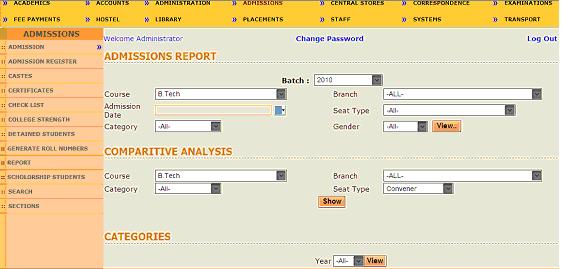
Now go to categories section and select year and click on view button to view the report as follows. 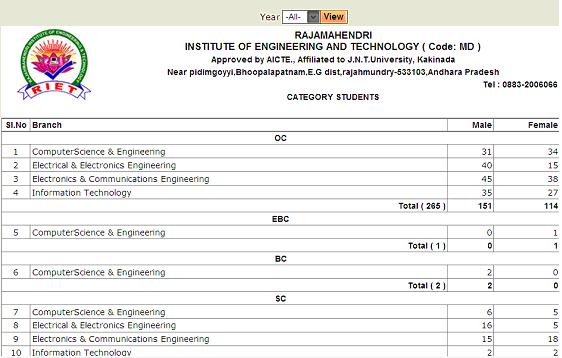
Above report shows category wise male and female students admitted in the college. |
| A: |
Click on Admissions link on top bar and click on Scholarship Students link on left panel to find the next screen as follows. 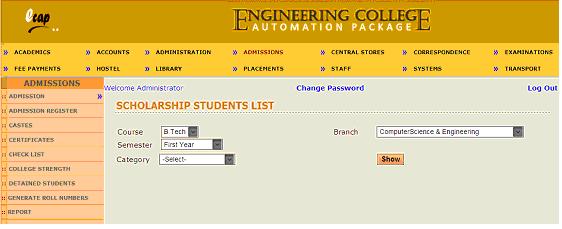
Now select course, branch, semester and category from dropdowns and click on show button to view the report as follows. 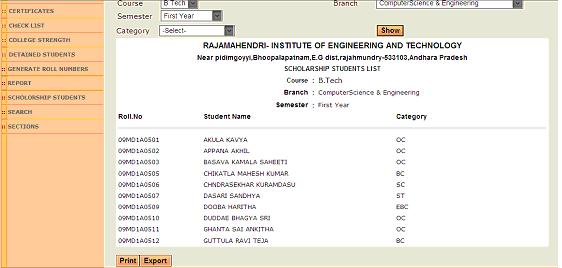
Above report shows all eligible students of 1st year B.Tech CSE students for scholarship and fee reimbursement. |
| A: |
Click on Admissions link on top bar and click on Search link on left panel to find the next screen as follows. 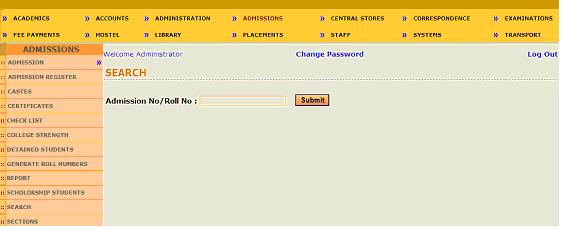
Now enter student roll number or admission number (prior to generation of roll number) and click on submit button to find next screen as follows. 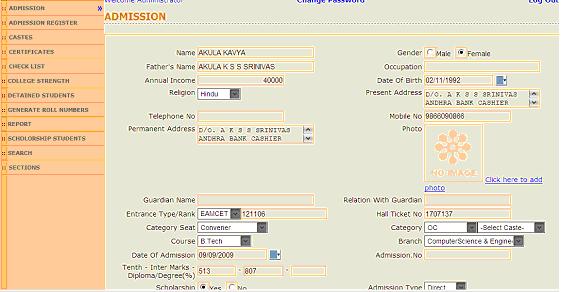
Above screen display Biodata of selected student in Edit mode. Now data can be modified and click on Update button to save changed profile for the student selected. |
| A: |
Click on Admissions link on top bar and click on Search link on left panel to find the next screen as follows. 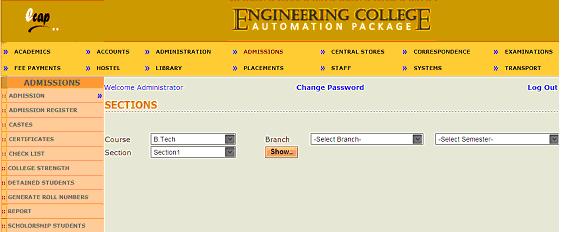
Now select course, branch and semester and click on Show button to find the next screen as follows. 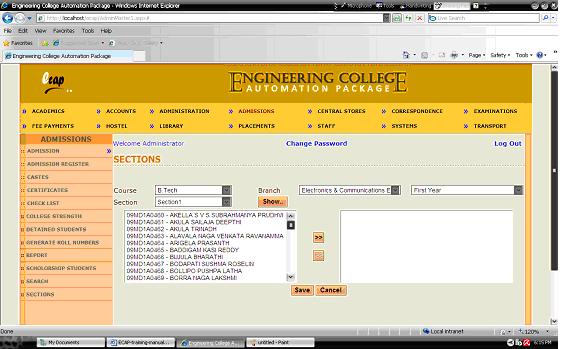
Now select section and select some students being assigned to selected section and click on >> button to transfer them to right box and click on save button to assign these students to section selected. Similarly other students can be assigned to other sections. |