Click on a question below to see the answer.
To View all answers
| A: |
Click on Examinations link on top bar and click on Admissions Report link on left panel to find the next screen as follows. 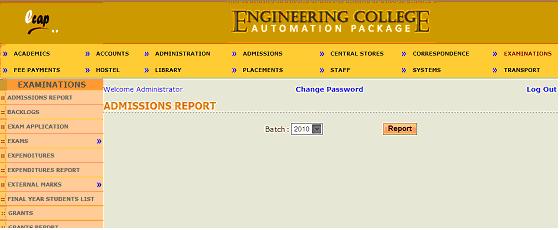
Now select batch from the dropdown and click on Report button to find the report as follows. 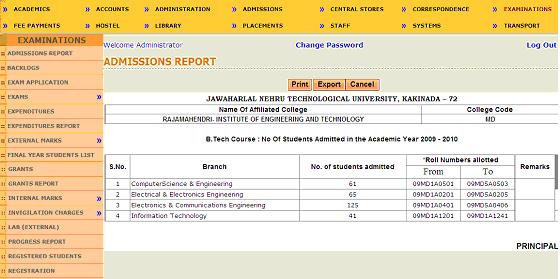
|
| A: |
Click on Examinations link on top bar and click on Backlogs link on left panel to find the next screen as follows. 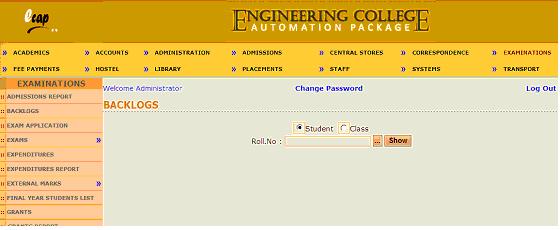
Student option is selected by default. Now enter or select roll number of any student and click on Show button to find the report as follows. 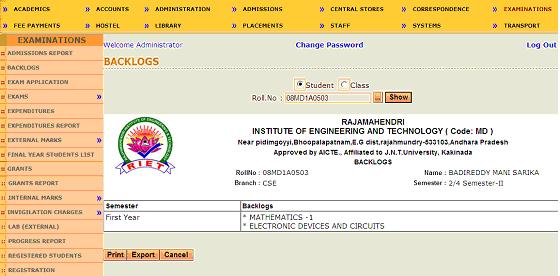
If you select Class radio button, next screen will be as follows. 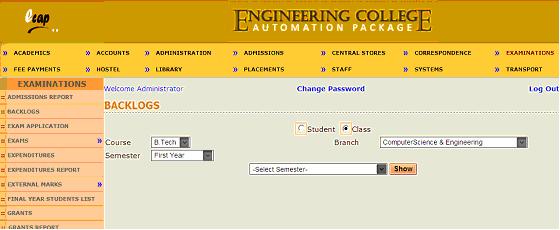
Now select course, branch and semester and select for which semester you want to see backlogs and click on Show button to find the report as follows. 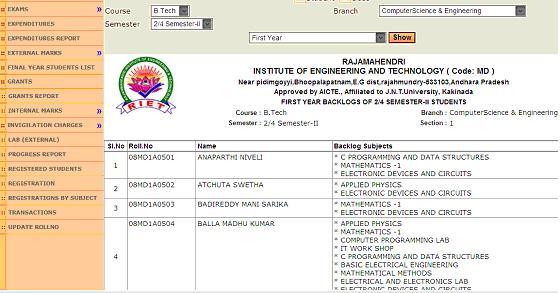
Above report shows backlogs in a particular semester of students of selected semester. Similarly you can view backlogs in another semester by selecting another semester from the dropdown for same students. |
| A: |
Click on Examinations link on top bar and click on Exam Application link on left panel to find the next screen as follows. 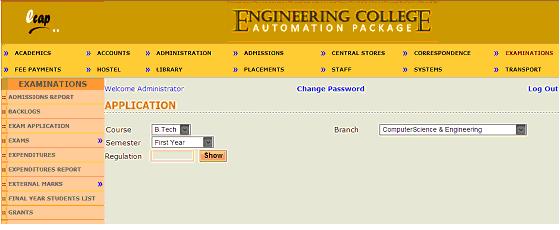
Now select course, branch and semester from dropdowns and enter Regulation in the text box provided and click on Show button to view application form as follows. 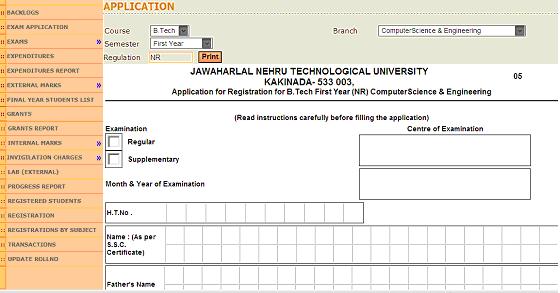
Application form can be printed by clicking on Print Button. |
| A: |
Click on Examinations link on top bar and place cursor on Exams link on left panel and click on Set Month & Year link from the popup menu displayed to find next screen as follows. 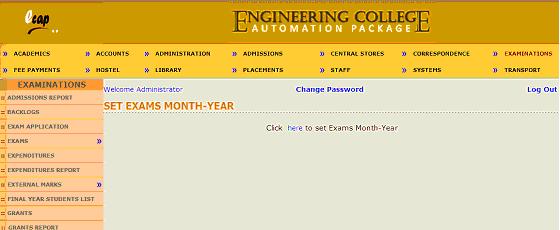
Now click on Here link to find next screen as follows. 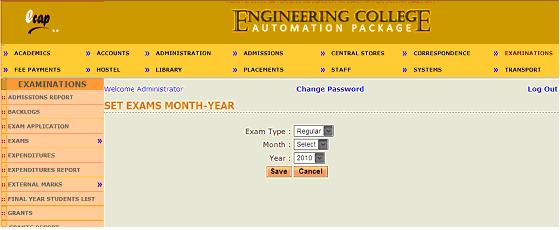
Now select Exam Type, Month and Year from dropdowns and click on save button to save record. These details can be edited later on. |
| A: |
Click on Examinations link on top bar and place cursor on Exams link on left panel and click on Set Fee link from the popup menu displayed to find next screen as follows. 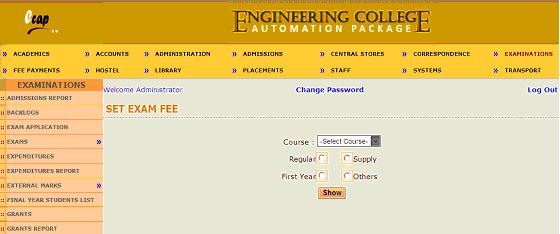
Now select course from the dropdown and select one of the radio buttons between Regular and Supplementary and First Year and Others and click on show button to find next screen as follows. 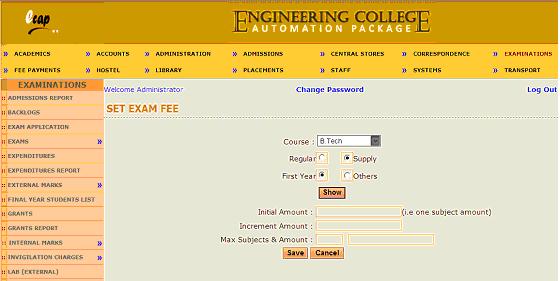
Now enter amounts as asked for in the text boxes and click on Save button to save fee details. |
| A: |
Click on Examinations link on top bar and place cursor on Exams link on left panel and click on Due Date link from the popup menu displayed to find next screen as follows. 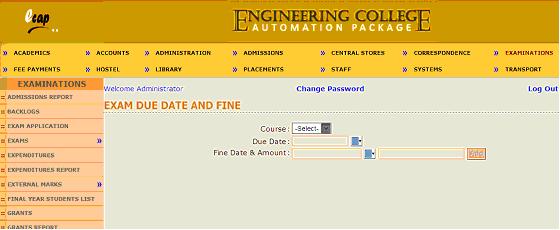
Now select Course to find next screen as follows. 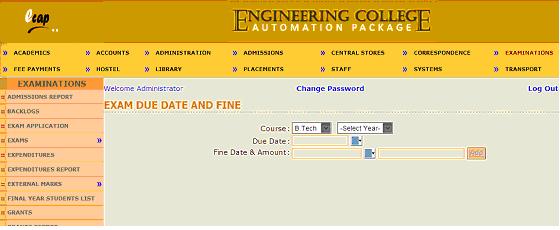
Now select semester and select due date for payment of fees and select first fine date and enter amount in the text box and click on add button to add first fine period and similarly you can add second fine period and the screen will be as follows. 
Note that fine dates should be later than current date. Now click on Save button to save the details. |
| A: |
Click on Examinations link on top bar and place cursor on Exams link on left panel and click on Schedules link from the popup menu displayed to find next screen as follows. 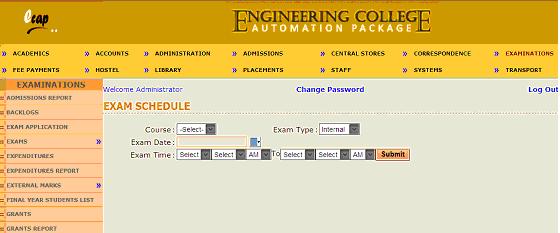
Now select course, exam type(If you select External, you need to enter Regulation in the text box displayed), exam date and timings and click on Submit button to find next screen as follows. 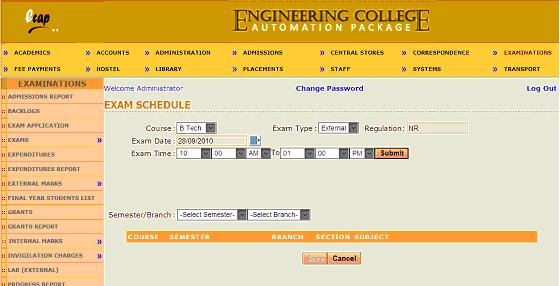
Now select semester and branch from the dropdowns to find next screen as follows. 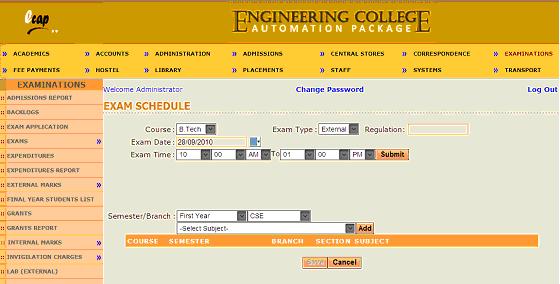
Now select subject from the dropdown and click on add button . You can add all subjects for which exam will be conducted on the same day and same timings as shown in below screen. 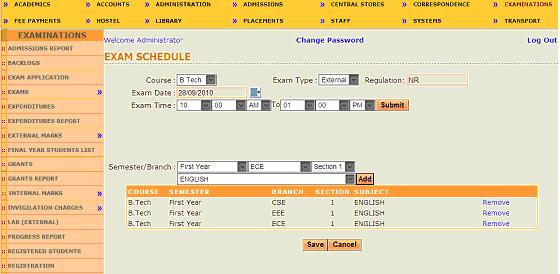
Now click on Save button to save exams time table for the day selected. Similarly you can select another date and select timings and select semester/branch and subjects. |
| A: |
Click on Examinations link on top bar and place cursor on Exams link on left panel and click on Exam Schedule Report link from the popup menu displayed to find next screen as follows. 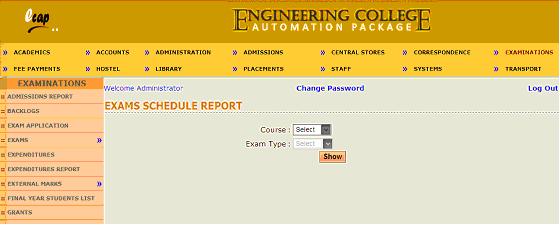
Now select course to find next screen as follows. 
Now select batch and exam type. If you select External as exam type, you need to enter Regulation in the text box displayed and click on Show button to find the report as follows. 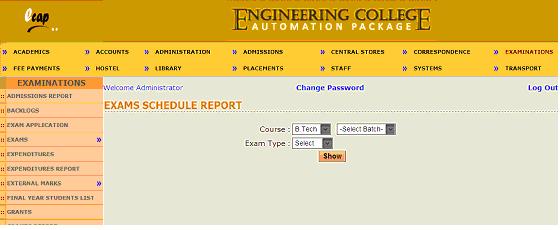
Now you can click on print button to take print out of this schedule. |
| A: |
Click on Examinations link on top bar and click on Grants Link on left panel to find next screen as follows. 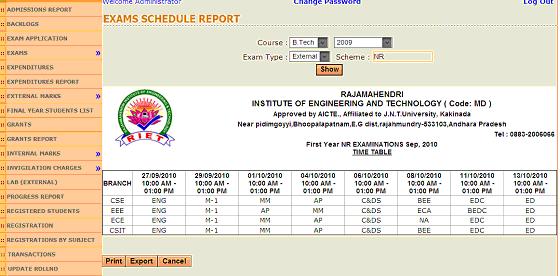
Now select University or college from the dropdown and enter granted amount in the text box provided, select date and payment method and enter narration in the multi line textbox provided and click on Save button to save the record.
|
| A: |
Click on Examinations link on top bar and click on Expenditures Link on left panel to find next screen as follows. 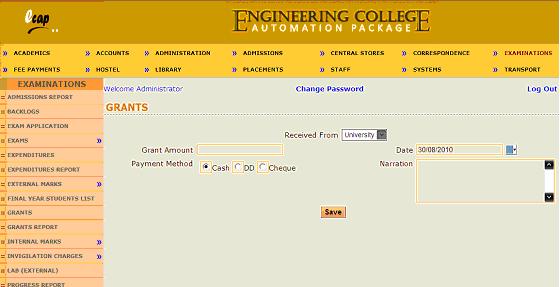
Select from the grant from which expenditure is being incurred, enter the name of the person or company to whom amount is being paid in the Paid to Text box, enter amount, select date and payment mode. If payment mode is DD or Cheque, enter cheque/DD details and enter description of transaction in the Narration text box and click on save button to save the record.
|
| A: |
Click on Examinations link on top bar and click on Expenditures Report Link on left panel to find next screen as follows. 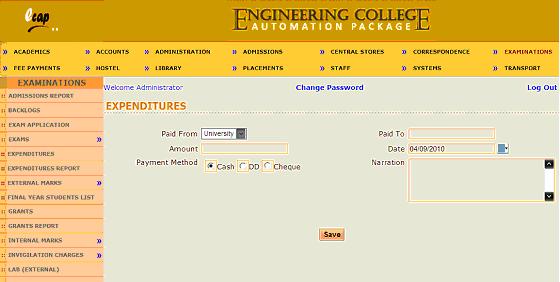
Now select Grant Type from the dropdown and select the period for which expenditure needs to be tracked and click on show button to find the report as follows. 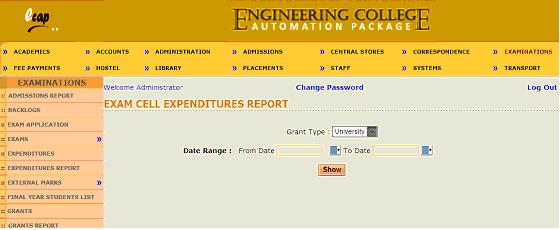
|
| A: |
Click on Examinations link on top bar and place cursor on External Marks link on left panel and click on Entry link on the popup menu displayed to find next screen as follows. 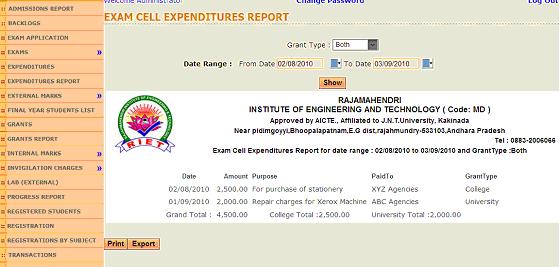
Now select course, Branch and Semester from dropdowns and also select for which semester marks are being posted and click on show button to find next screen as follows. 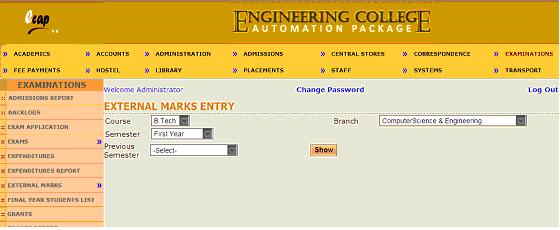
Above screen shows two cells for every subject. Post internal marks in the first cell and external marks in the second cell. Order of subjects can be changed by selecting different subjects from the dropdowns for user convenience. You can leave cells blank if students became absent for certain subjects. After posting marks click on Save button to save marks. |
| A: |
Click on Examinations link on top bar and place cursor on External Marks link on left panel and click on Reports link on the popup menu displayed to find next screen as follows. 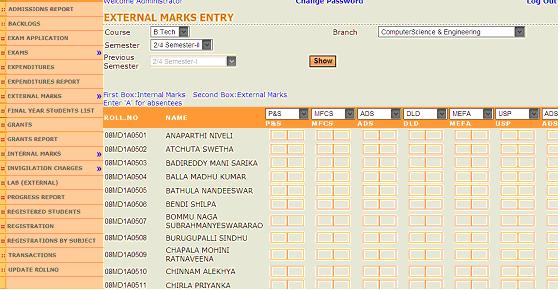
Now select course, branch and semester from respective dropdowns and click on Show button to find next screen as follows. 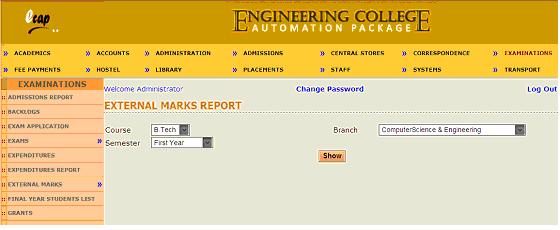
In above screen, dropdown below to Show button shows all previous semesters to the selected semester. Now select semester for which marks to be viewed to find marks report as follows. 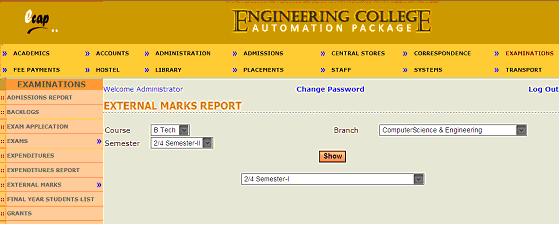
Above report shows 3 sub cells for each subject. First cell shows internal marks, second cell shows external marks and third cell shows credits. Last three columns shows total marks obtained, total credits and Pass/Fail status for each student. Bottom of the report, you find number of students passed and number of students failed. |
| A: |
Click on Examinations link on top bar and place cursor on External Marks on left panel and click on Analysis link on the popup menu displayed to find next screen as follows. 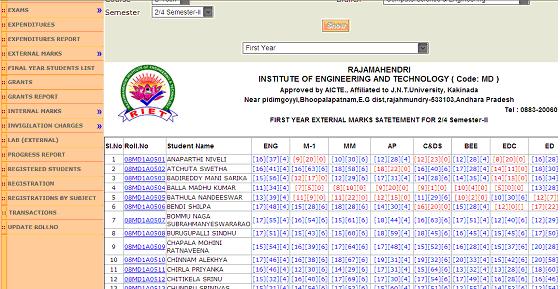
Now select course, branch and semester and click on Show button to find next screen as follows. 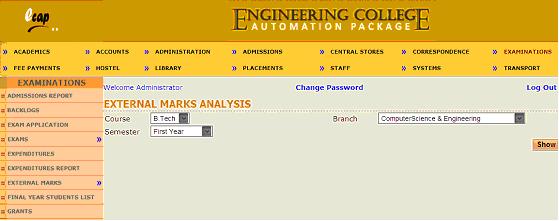
By default dropdown below to show button shows immediate previous semester to the selected semester. Now select semester from the dropdown below to show button for which students marks to be analyzed. Next screen will be as follows. 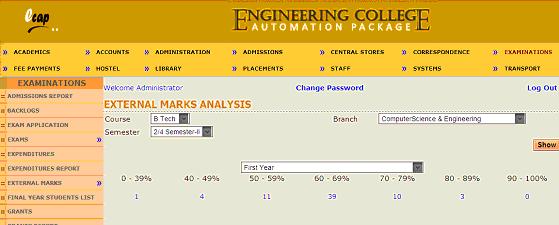
Above report shows how many students have got percentage between 0 and 39% , 40% and 49%, 50% and 59%, 60% and 69%, 70% and 79%, 80% and 89% and 90% and 100%. Now you can click on numbers shown to view list of students as follows. 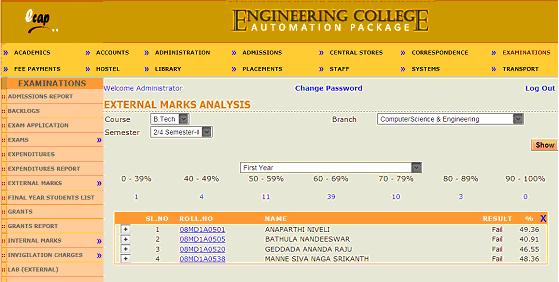
Now click on + symbol against student roll number to view subject wise marks as follows. 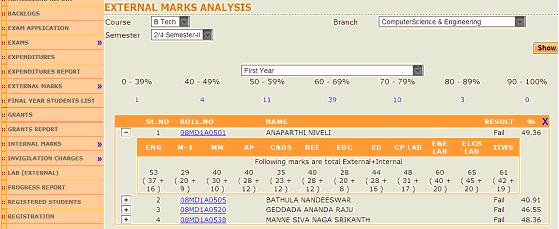
You can click on any roll number to view student profile in next window. |
| A: |
Click on Examinations link on top bar and click on Final Year Students List link on left panel to find next screen as follows. 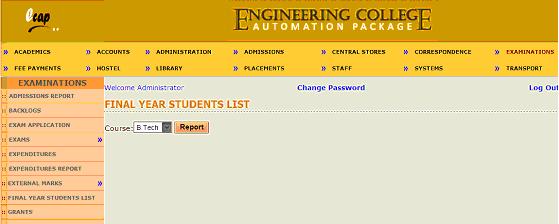
Now select course from course dropdown and click on Report button to view final year/semester students of course selected as follows. 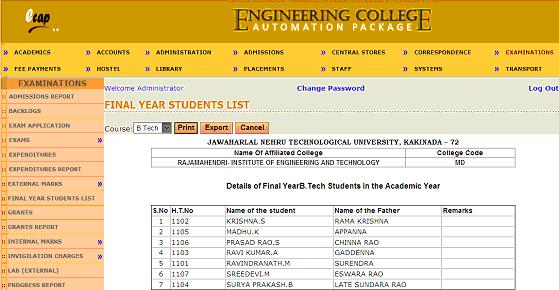
|
| A: |
Click on Examinations link on top bar and place cursor on Internal Exams link on left panel and click on Entry link on popup menu displayed to find next screen as follows. 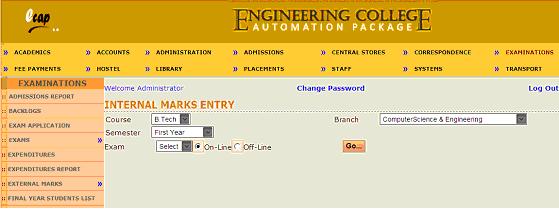
Now select course, branch, semester from respective dropdowns and also select exam for which marks need to be posted. Now select either Online or Offline mode to post marks. If Online mode is selected and Go button is clicked, next screen will be as follows. 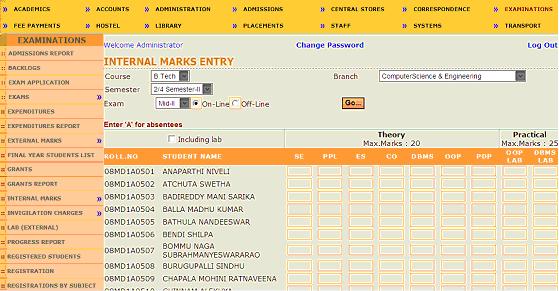
Now select Including Lab check box if marks are being posted for all subjects including labs. Now enter marks subject wise for each student in the text boxes provided and click on save button to save marks. If Offline mode is selected, next screen will be as follows. 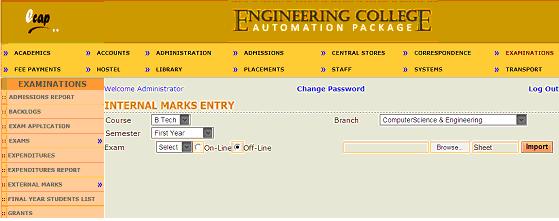
Now select the path of excel file containing marks by clicking on Browse button and enter sheet name in the text box provided and click on Import button to extract marks from excel file and store in database. |
| A: |
Click on Examinations link on top bar and place cursor on Internal Exams link on left panel and click on Reports link on popup menu displayed to find next screen as follows. 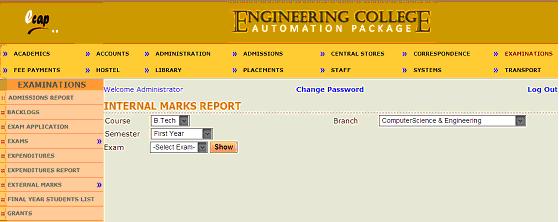
Now select course, branch, semester and exam from respective dropdowns and click on show button to find report as follows. 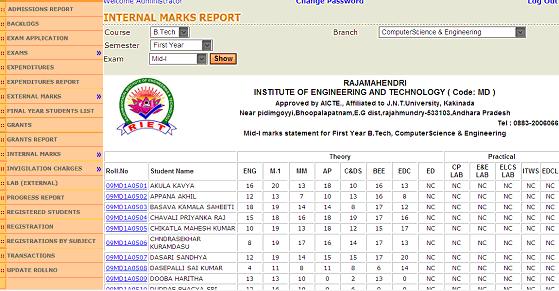
NC means Not conducted. |
| A: |
Click on Examinations link on top bar and place cursor on Internal Exams link on left panel and click on Analysis link on popup menu displayed to find next screen as follows. 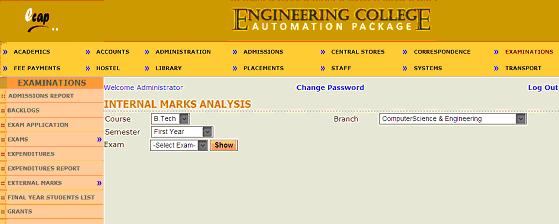
Now select course, branch, semester and exam from respective dropdowns and click on Show button to find next screen as follows. 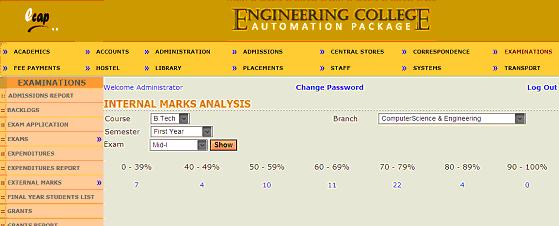
Above report shows how many students have got percentage between 0 and 39% , 40% and 49%, 50% and 59%, 60% and 69%, 70% and 79%, 80% and 89% and 90% and 100%. Now you can click on numbers shown to view list of students as follows. 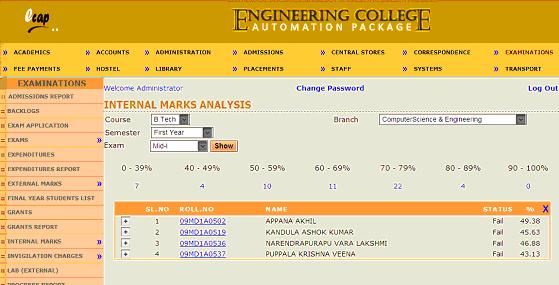
Now click on + symbol against student roll number to view subject wise marks as follows. 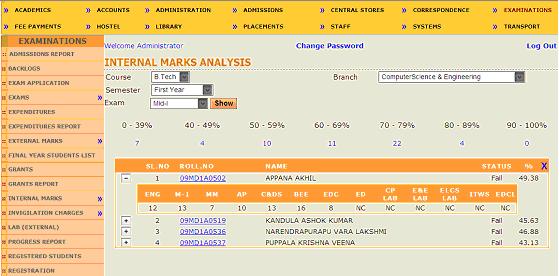
You can click on any roll number to view student profile in next window. |
| A: |
Click on Examinations link on top bar and place cursor on Invigilation Charges link on left panel and click on Entry link on the popup menu displayed to find next screen as follows. 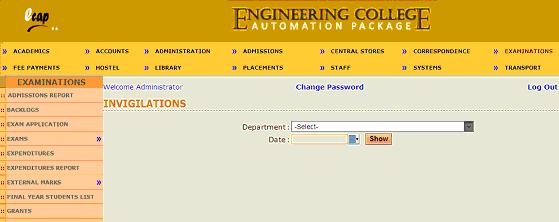
Now select department and select date (Prior to current date) and click on Show button to find next screen as follows. 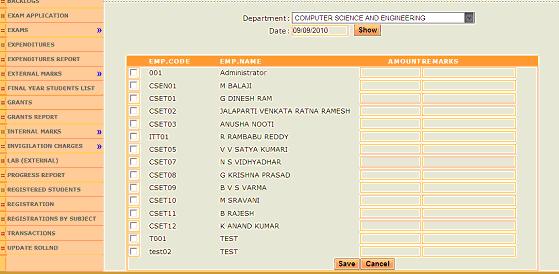
Now select check boxes against staff names who performed invigilation duty on selected date and enter invigilation amounts and remarks on the text boxes provided and click on Save button to save records. These charges will be shown in concerned month pay slips of concerned staff. |
| A: |
Click on Examinations link on top bar and place cursor on Invigilation Charges link on left panel and click on Report link on the popup menu displayed to find next screen as follows. 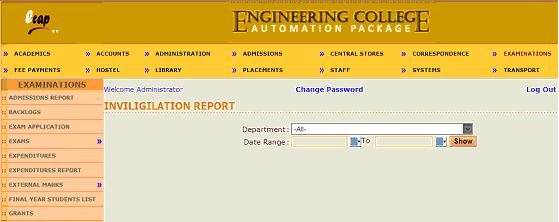
Now select department and select date range within a month and click on Show button to view report of invigilation charges payable/paid to staff of selected department.
|
| A: |
Click on Examinations link on top bar and click on Lab(External) link on left panel to find next screen as follows. 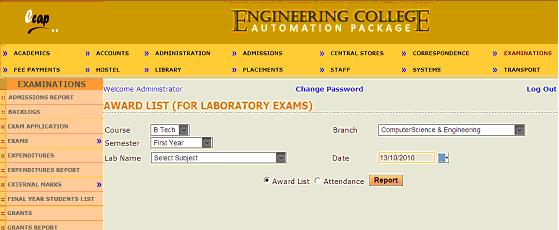
Now select course, branch, semester and lab from respective dropdowns. Select lab exam date and select attendance radio button and click on Report button to find next screen as follows. 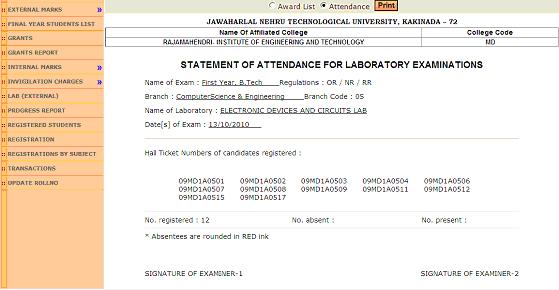
Above report can be taken print out and used to mark attendance for students appearing for lab external examination. |
| A: |
Click on Examinations link on top bar and click on Lab(External) link on left panel to find next screen as follows. 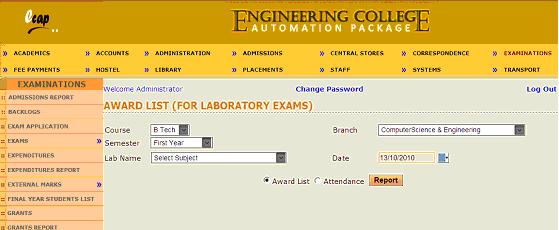
Now select course, branch, semester and lab subject from respective dropdowns. Select lab exam date and award list radio button and click on Report button to view award list as follows. 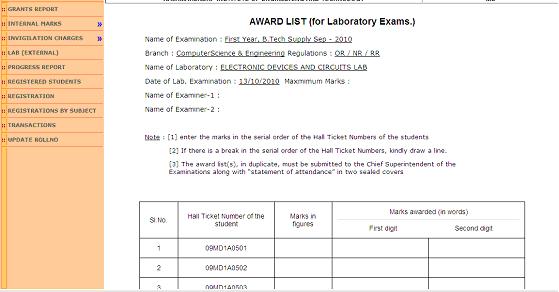
Above format can be printed out and used for entering external exam marks for selected lab. |
| A: |
Click on Examinations link on top bar and click on Progress report link on left panel to find next screen as follows. 
You can generate progress reports for all students of selected semester or single student. To generate progress reports for all students of a semester, select class radio button. Now select course, branch and semester from respective dropdowns and select check box against exam which marks need to be sent. You can select more than one exam by selecting check boxes against exam names. You can also include attendance details in progress report by selecting month and year for attendance. Now click on Generate button to generate progress reports as follows. 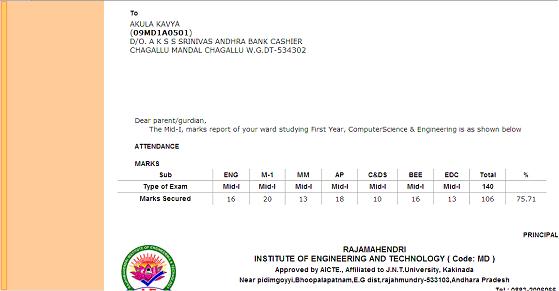
Above screen shows progress reports containing Mid-I marks for all students. You donít need to type addresses. Addresses will be shown and printed automatically. You can simply take print out all progress reports and send them by post to parents. You can generate progress report for single student by selecting student radio button to find next screen as follows. 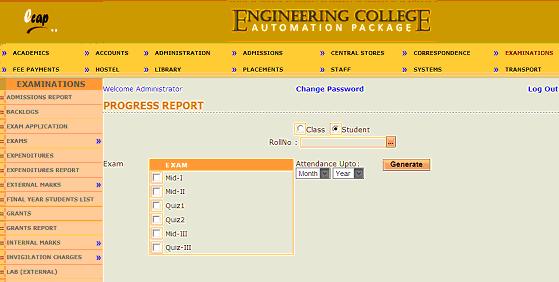
Now select or enter student roll number and select check boxes against exams and attendance month and year and click on Generate button to generate progress report for selected student. |
| A: |
Click on Examinations link on top bar and click on Registered Students link on left panel to find next screen as follows. 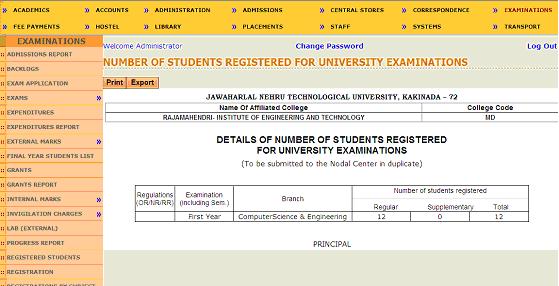
Above screen shows number of students registered branch wise semester wise for semester end examinations.
|
| A: |
Click on Examinations link on top bar and click on Registered Students link on left panel to find next screen as follows. 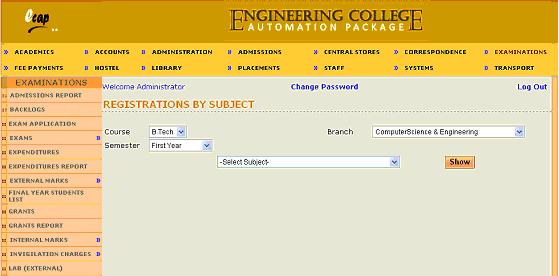
Now select course, branch and semester and subject from the respective dropdowns and click on Show button to view the list of students registered for selected subject as follows. 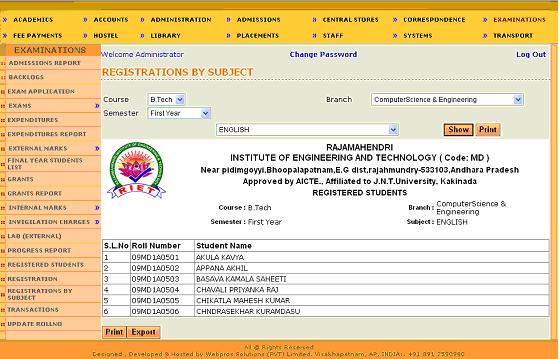
|
| A: |
Click on Examinations link on top bar and click on Transactions Link on left panel to find next screen as follows. 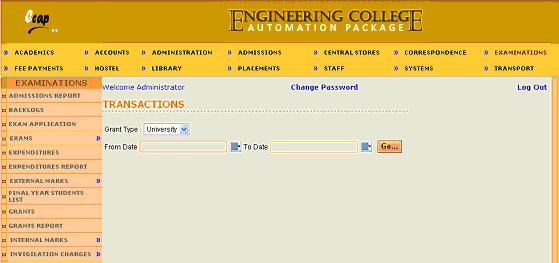
Now select grant type from dropdown and select date range and click on Go button to find report as follows. 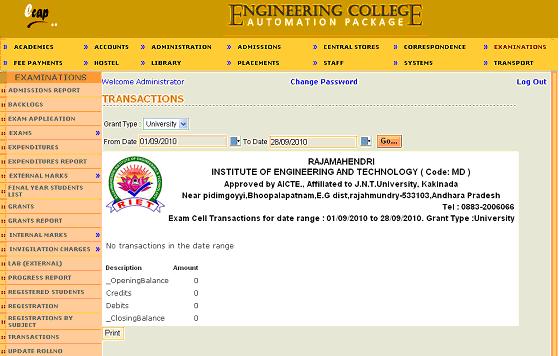
Above report shows opening balance and credits and debits taken place during the period selected and closing balance at the end. |