Click on a question below to see the answer.
View all answers
| A: |
Click on Transport link on top bar and click on Vehicles link on left panel to find next screen as follows. 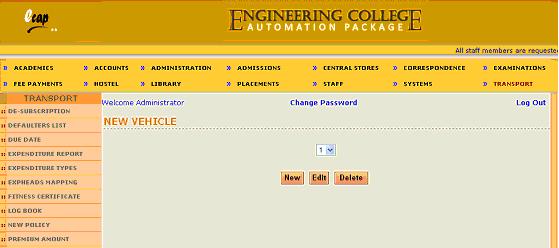
Above screen shows existing vehicles in the dropdown so that a vehicle can be selected for modification or deletion. Now to add new vehicle, click on New button to find next screen as follows. 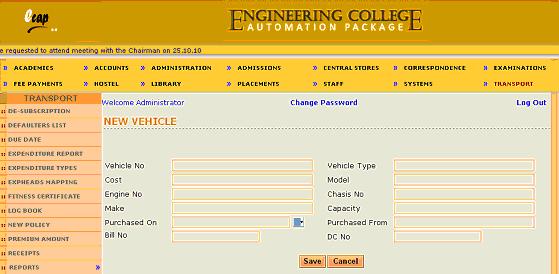
Now enter new vehicle details in the text boxes provided and click on Save button to save new vehicle details. |
| A: |
Click on Transport link on top bar and click on Route & Halts link on left panel to find next screen as follows. 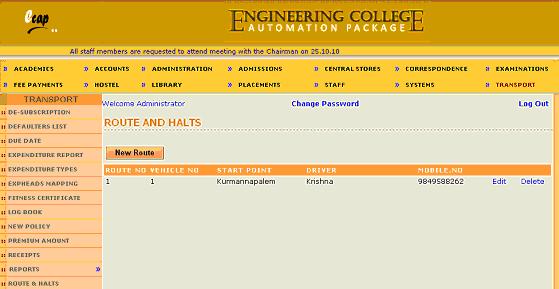
Above screen shows existing routes already created. They can be either edited or deleted. Now to add new route, click on New Route button to find next screen as follows. 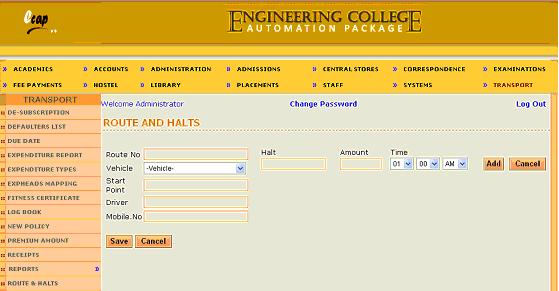
Now enter Route No, select Vehicle, enter Starting point, driver name and mobile number in the text boxes provided. Now enter Halt name and transport fee amount and select pick up time and click on add link to add another halt in the same route. Similarly you can add any number of halts. Now click on Save button to save route with halts data. |
| A: |
Click on Transport link on top bar and place cursor on Students Halts link on left panel and click on Entry link on the popup menu displayed to find next screen as follows. 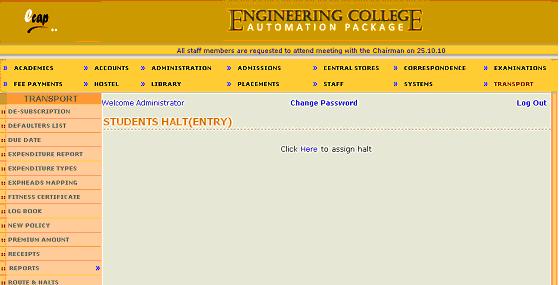
Now click on Here to find next screen as follows. 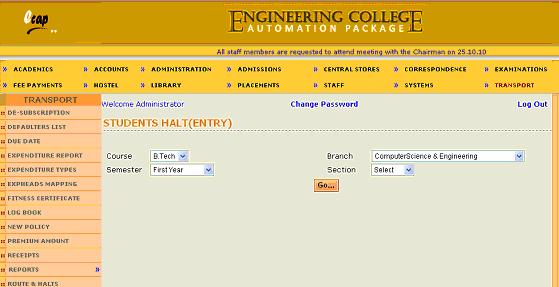
Now select course, branch, semester and section from respective dropdowns and click on Go button to find next screen as follows. 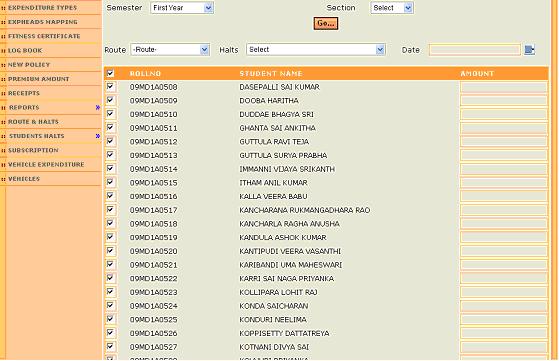
Above screen shows students list of semester selected. Now select route and halt from respective dropdowns. Now Amount specified for the halt is shown in the text boxes. Now select students by selecting checkboxes against roll numbers and change amount for any student if needed and select date from which these students subscribe to transport service and click on save button to save data. |
| A: |
Click on Transport link on top bar and click on Subscription link on the left panel to find next screen as follows. 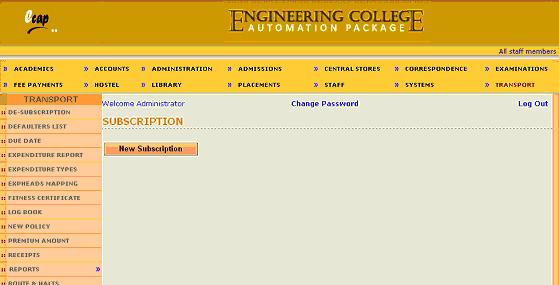
Now click on New Subscription link to find next screen as follows. 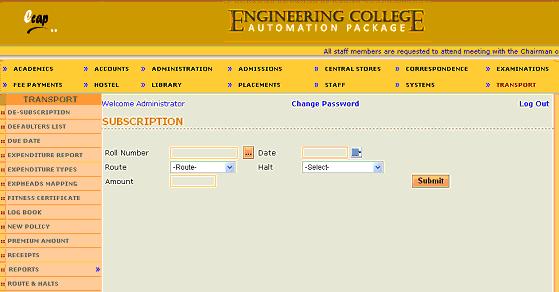
Now enter or select roll number of student, select route and halt from respective dropdowns and select date from which selected student avails transport service and click on Submit button to save subscription details. |
| A: |
Click on Transport link on top bar and click on De-Subscription link on the left panel to find next screen as follows. 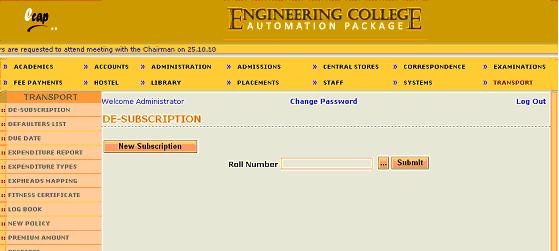
Now enter or select roll number of student who is going to de-subscribe from transport service and click on Submit button to find next screen as follows. 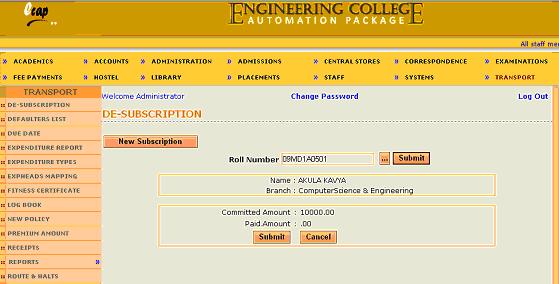
|
| A: |
Click on Transport link on top bar and place cursor on Reports link on left panel and click on Route & Halt Search link on the popup menu displayed to find next screen as follows. 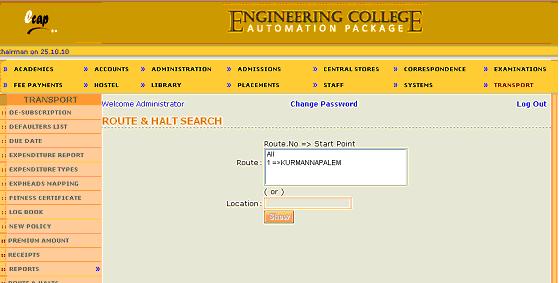
Now select any route or enter any halt in location text box and click on Show button to find next screen as follows. 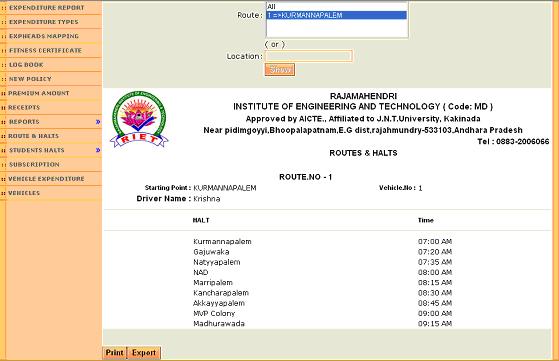
|
| A: |
Click on Transport link on top bar and place cursor on Reports link on left panel and click on Students By Route link on the popup menu displayed to find next screen as follows. 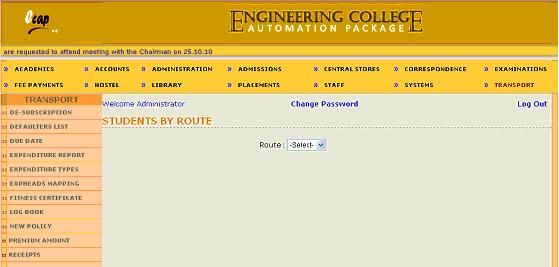
Now select any route to find list of students coming in the route, as follows 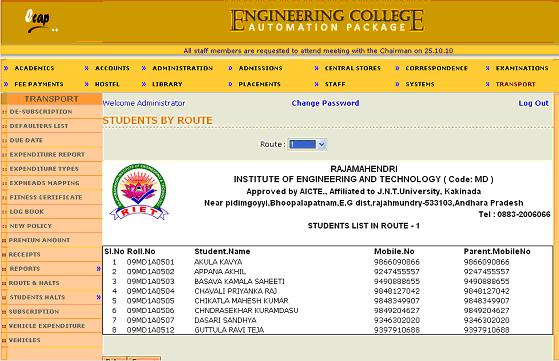
|
| A: |
Click on Transport link on top bar and click on Expenditure Types link on left panel to find next screen as follows. 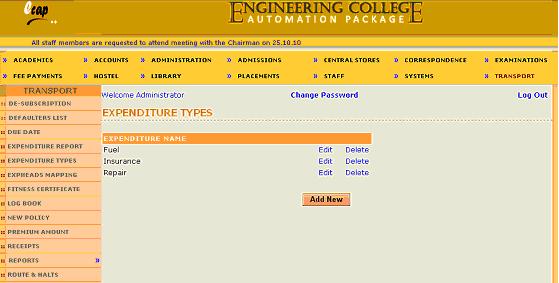
Above screen shows existing expenditure types already entered. To add new expenditure type, click on Add New link to find next screen as follows. 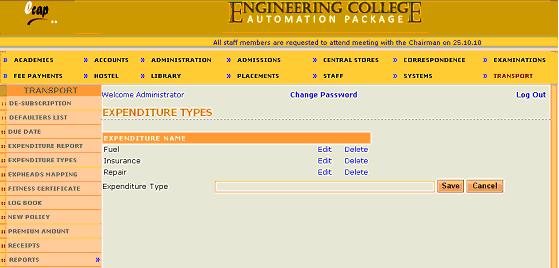
Now enter new expenditure type in the text box provided and click on Save button to save new expenditure type. |
| A: |
Click on Transport link on top bar and click on ExpHeads Mapping link on left panel to find next screen as follows. 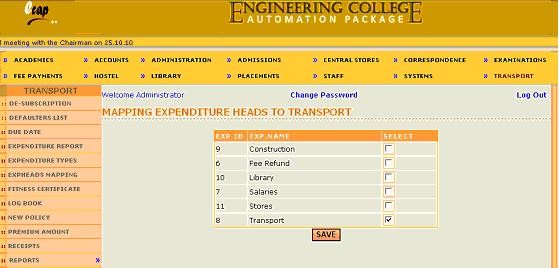
Now select check box against expenditure head under which all transport expenditure types are covered so that expenditure incurred by transport department is reflected in one expenditure head in accounts module. Now click on Save button to save the mapping details.
|
| A: |
Click on Transport link on top bar and click on Vehicle Expenditure link on left panel to find next screen as follows. 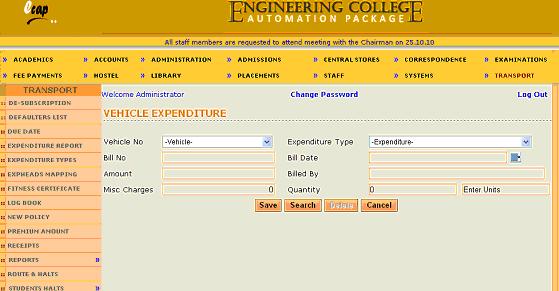
Now select Vehicle number and expenditure type from the dropdowns and enter Bill Number, Date, Amount etc in the text boxes provided and click on Save button to save expenditure details. These bills will be shown to accounts in-charge in accounts module for payment processing.
|
| A: |
Click on Transport link on top bar and click on Expenditure Report link on left panel to find next screen as follows. 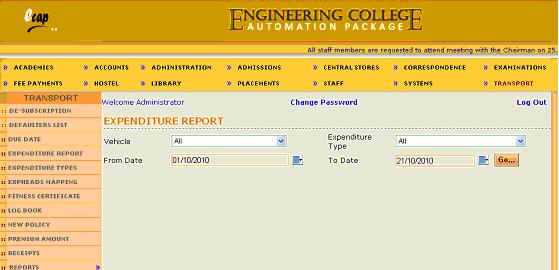
Now select vehicle and expenditure type from the dropdowns and select the period for which expenditure needs to be tracked and click on Go button to find the report as follows. 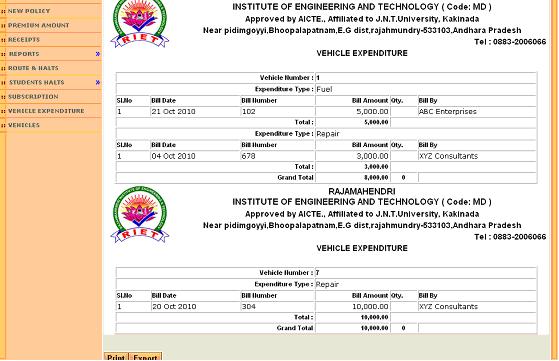
|
| A: |
Click on Transport link on top bar and click on Defaulters List link on left panel to find next screen as follows. 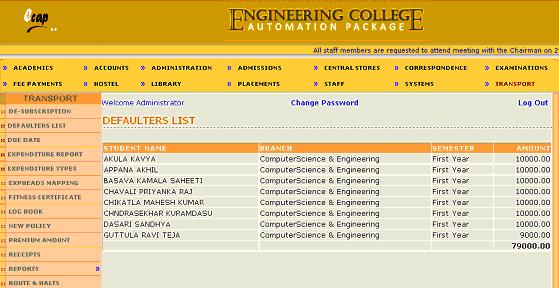
Above screen shows list of defaulters who are yet to pay transport fees.
|
| A: |
Click on Transport link on top bar and click on Log Book link on left panel to find next screen as follows. 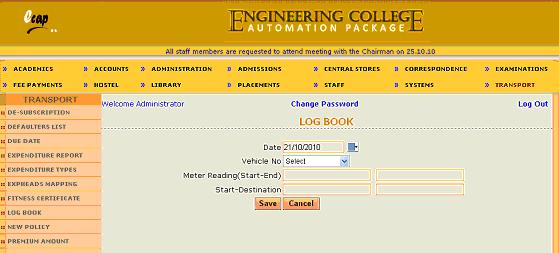
Now select date and vehicle and enter meter readings for start point and end points and also enter starting and ending points in the text boxes provided as shown below. 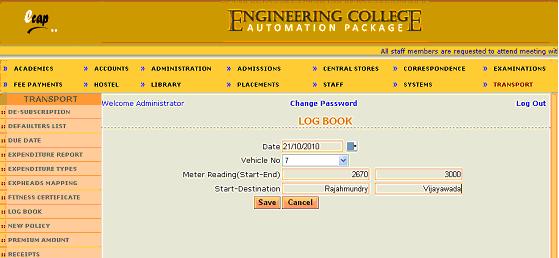
Now click on Save button to save log book details. |
| A: |
Click on Transport link on top bar and click on Fitness Certificate link on left panel to find next screen as follows. 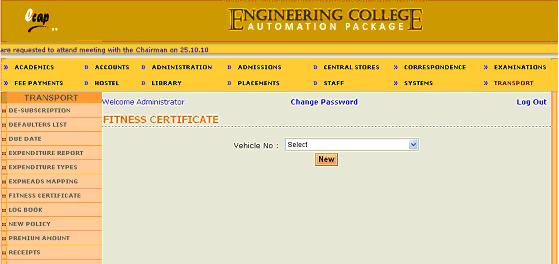
Now select vehicle from dropdown and click on New button to find next screen as follows. 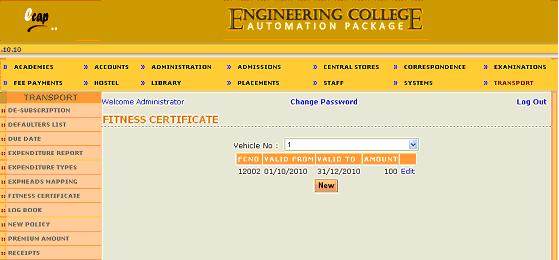
Above screen shows fitness certificates obtained previously for the vehicle selected and click on New button to find next screen as follows. 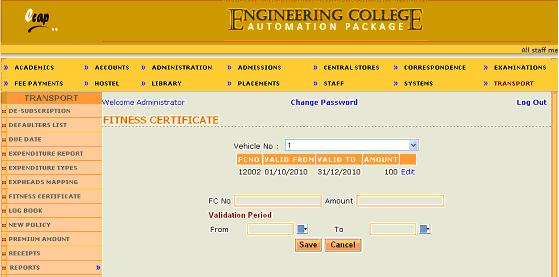
Now enter Fitness Certificate number, amount, validation periods in the text boxes provided and click on save button to save fitness certificate details. |
| A: |
Click on Transport link on top bar and click on New Policy link on left panel to find next screen as follows. 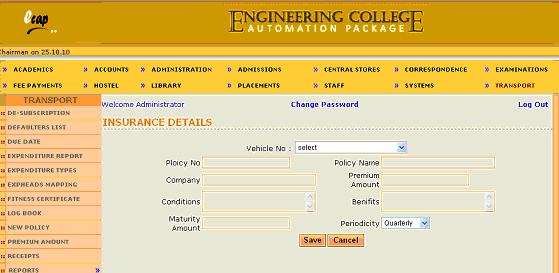
Now vehicle which is being insured and enter policy details in the text boxes provided and click on Save button to save insurance details for the selected vehicle.
|
| A: |
Click on Transport link on top bar and click on Premium Amount link on left panel to find next screen as follows. 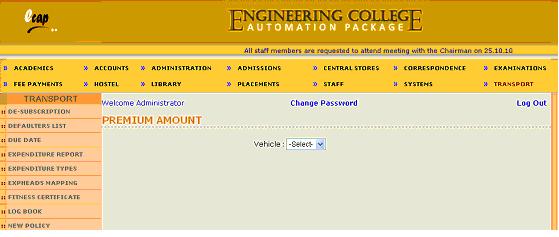
Now select vehicle to find next screen as follows. 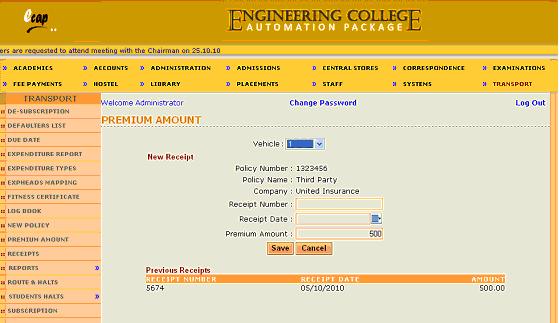
Above screen shows premiums already paid. Now enter new premium receipt number given by insurance company and receipt date and click on save button to save premium paid details. |